

Calibration Diagnostics

The Open.Theremin V3 has a fully automatic calibration function integrated. The calibration tunes the antenna oscillators with your antennas. All you need to do is press the button on the board for 3 seconds and wait for the calibration to finish (as described in the instruction manual). If you want to check and diagnose your calibration you can use the following "Calibration Diagnostics":
To see the calibration data open the Arduino IDE (that you used to upload the code to the Arduino).
1. With the Open.Theremin connected via USB to your computer, hit the "Serial Monitor" button on the top right.
The Serial Monitor window should open. (If not, check the serial port settings)
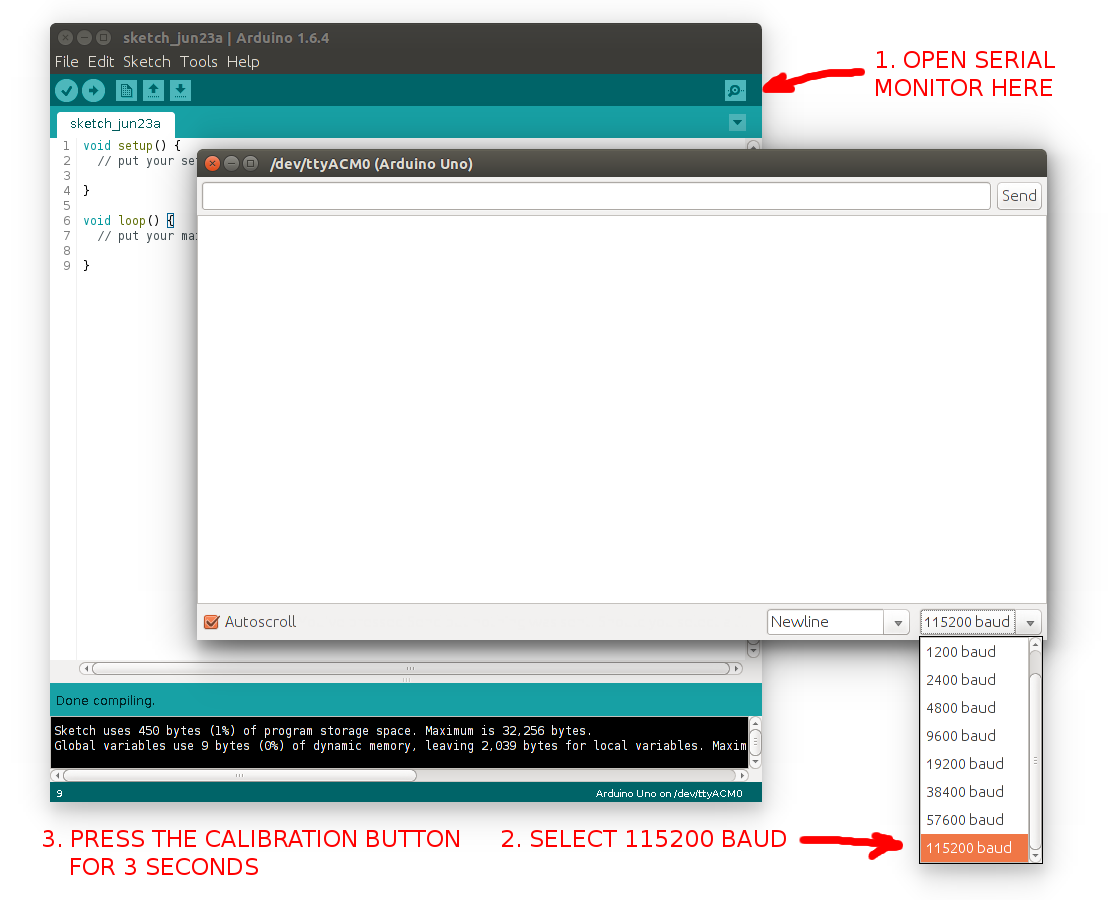
2. Now set the communication speed to 115200 baud through the pull down menu.
3. Start the calibration of your theremin by pressing the FUNCTION button for two seconds.
You should now see the calibration data appear in the Serial Monitor window.
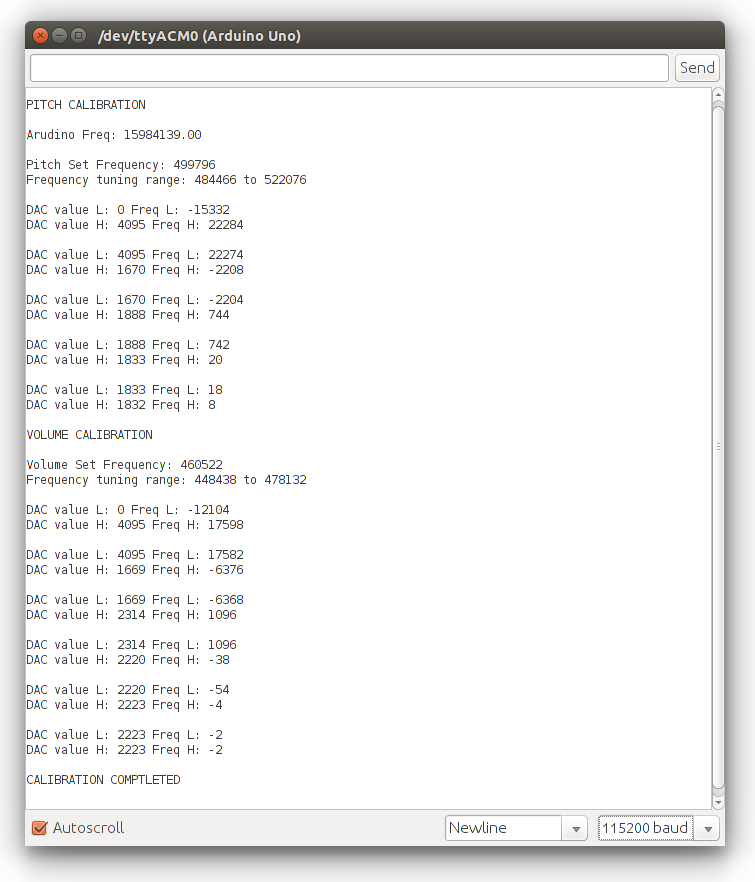
First the measured frequency of your Arduino is shown. Should be about 16'000 HZ
Then you see the pitch calibration data with the "Set Frequency" that and the "Tuning Range". Then you will see how the calibration routine adjusts the oscillators.
Then again the same procedure for the volume oscillators.
The calibration finishes with CALIBRATION COMPLETED.
If some of the values are 0 or out of range, check your antenna size and connections and restart.