Welcome to How To Grow (almost) Anything in GaudiLabs - Switzerland |
 |
Final Project: Setting up a microbiology lab
Introduction:GaudiLabs are creative spaces for working, thinking and living where culture and technology meet. We conduct open research in open source culture technology. Developing methods, process and devices to unite people and knowledge from different fields and backgrounds. The labs are built around do it your self and open source equipeement and run on a very limited budget. For now the labs include a digital fabrication lab, an micro electronics lab, a mobile lab, a basic wet lab as well as office and meeting areas.Project goal:
To goal of the HTGAA final project is to equip and start a microbiology lab as part of GaudiLabs. Microbiology, the study of microscopic organisms and cells, synthetic biology, the interdisciplinary branch of biology and engineering are exciting fields of science that with the DIYBio and hackteria.org movement step out of the institutional scientific labs into society. Now still a lot of requisites to do micro biology at home are hard to get or too expensive. With this project we want to find ways to set up a microbiology lab with low cost DIY lab equipement and materials readily available from local stores or from the internet. We take the first steps towards a functional biolab for synthetic biology by preparing bacterial stock from simple or adapted protocols.
Content:
- Regulation- Baisc lab equipement for microbiology
- Reagents and chemistry
- Lab devices for microbiology
- Microorganism and live stock
Regulations
Procedure to asses regulations:- Clarify what planned activities are subject to authorization.
- Make a risk assessment
- Set in place measures necessary to protect humans, animals and the environment (Art. 12 ESV; Anhang 4 ESV);
- Store all relevant information about the activity (activity record)
We assessed the risks, defined a Biosafety Officers (BSO) with his duties and responsibilities.
We found that to work with genetically modified organisms (GMO) an authorization must be obtained in Switzerland according to the Containment Ordinance (Einschliessungsverordnung, ESV).
We applied for the corresponding license.
(Who will carry out an activity within the meaning of the ESV , mess before commencing operations)
Baisc lab equipement for microbiology
Microbiology is a bit like cooking. So you need quite a bit of tools to
set up your kitchen. Some materials can be taken from kitchen ware such as
small plastic beaker, hot plates or steam cooker. Some equipment is more
specific and harder to get such as pippetors, tips and small sample holders.
Here is what we got as basic equipment for our DIY micro biology lab:
To look like a cool scientist in micro biology you need these. Pipettors are quite expensive. Try to get second hand from the internet (ebay or VWR Pirppets) or from a good friend in a lab.
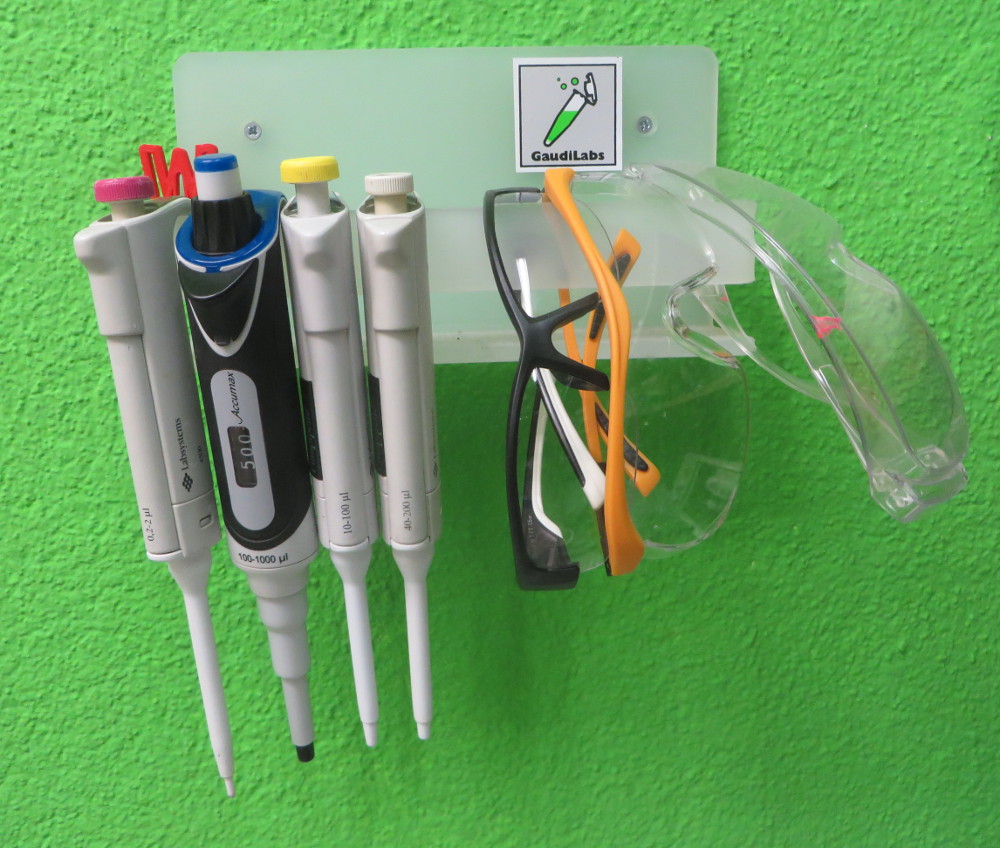
We got ours from the shut down Merk-Serono Head Quarter in Geneva.
For the pipettors you need pipette tips. And you need a lot of them. And different sizes (20ml, 200ml and 1000ml are good standard size). Some boxes are heat resistant so the tips can be sterilized in the box. Some tips come with a built in filer to prevent you from contaminating your pipettor (I guess). Make sure the tips fit with the pipettor,, there seem to be different standards.
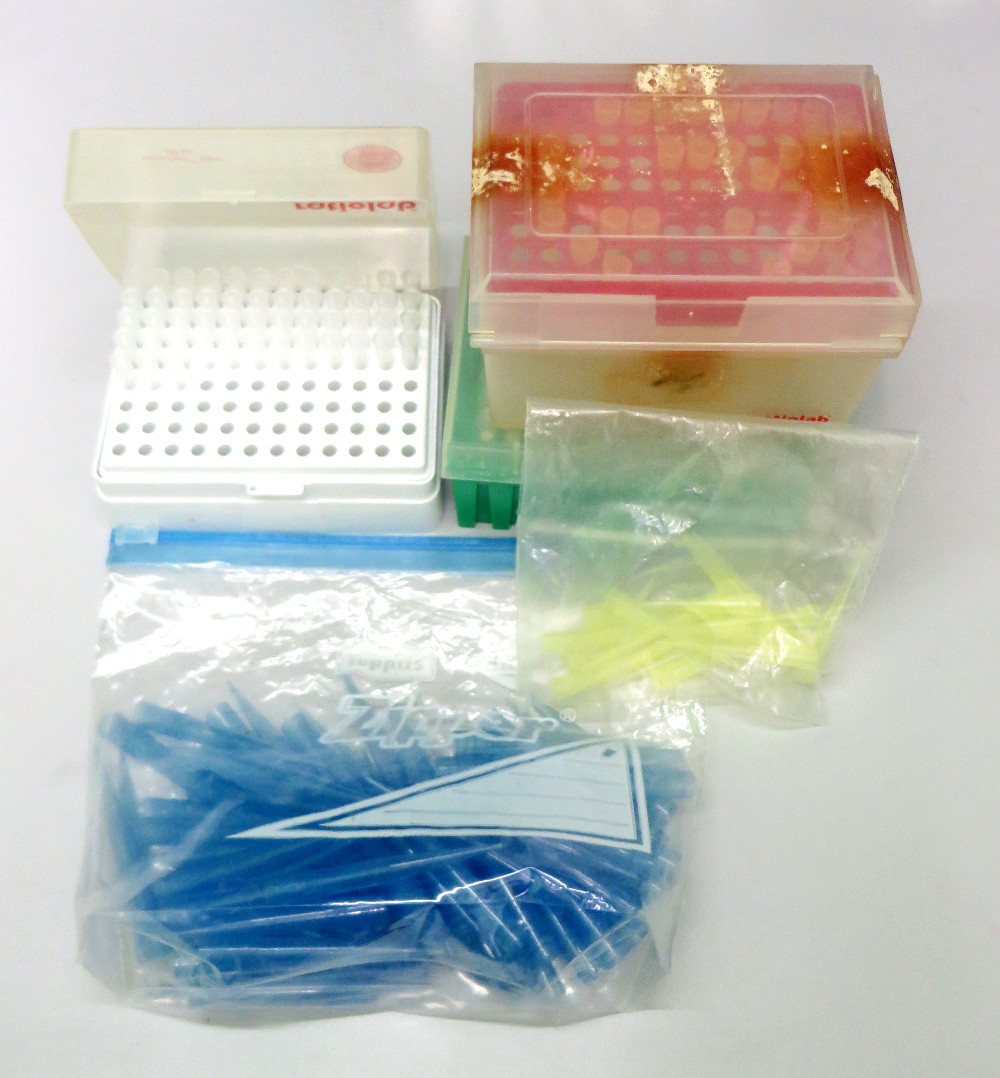
We got different tips donated from institutional labs.
A good -20°C fridge
Before getting valuable substance for microbiology such as pure bacteria strains and specific enzymes you need a place to store them. You can get down to -20° with a regular fridge. Small plastic containers and bags are good to keep the inside orderly.
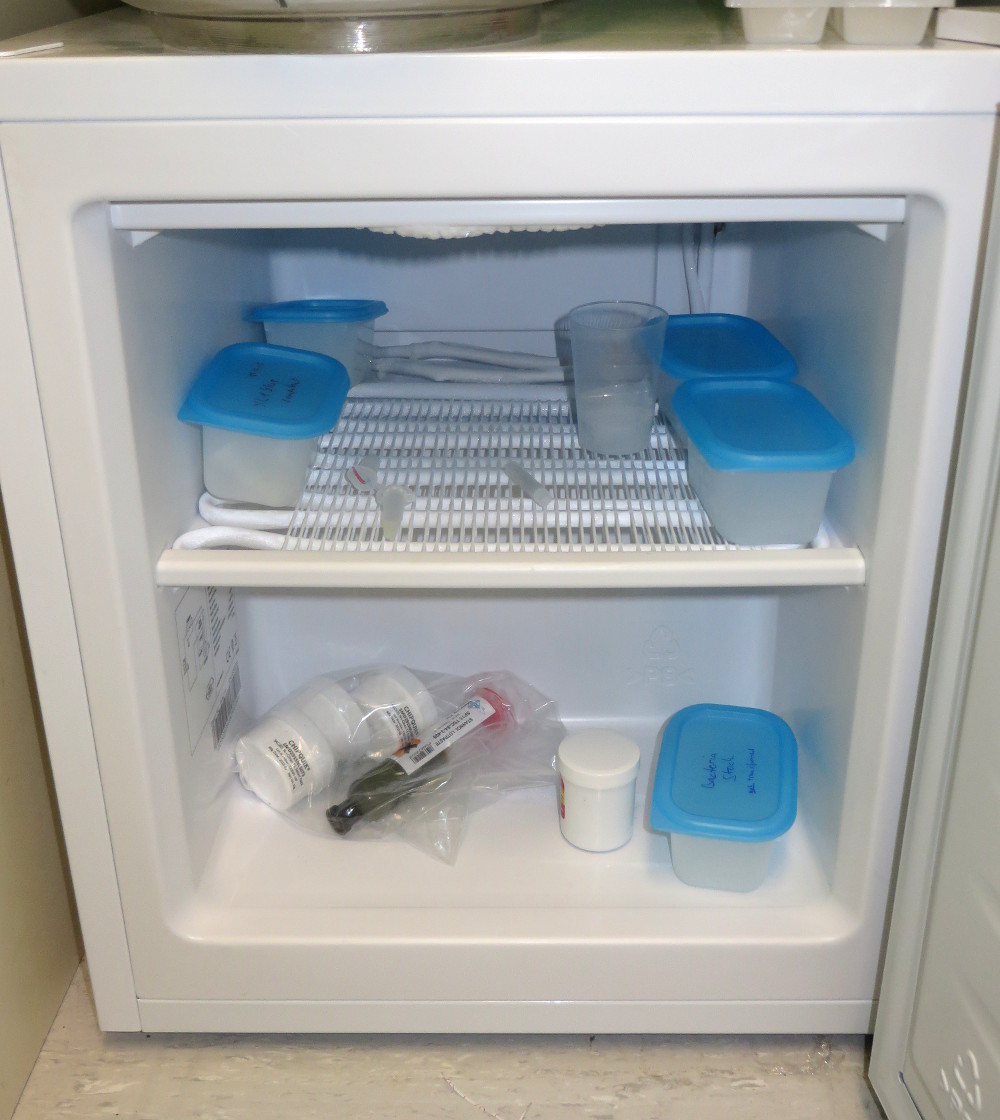
We bought this fridge new.
Flasks and other glass ware
You need a lot of these. While regular jarm glass might work too the real chemistry flasks are quite easy and cheap to get, usually have a scale printed on and are heat resistant. Volumes of 100ml and 250ml are best. You don't want to start with too big volumes and big is also more difficult to sterilize.

Steam cooker for sterilizing
One of the most difficult parts in microbiology and synthetic biology is to work sterile. A lot of effort has to be taken to keep cultures pure in order to know what you are doing. To sterilize materials a steam cooker is an easy solution. You can use it to sterilize glass ware as well as for sterilizing liquid media. And finally you also have to get rid of all the bacteria and other microorganisms you made, so there also sterilization is used.
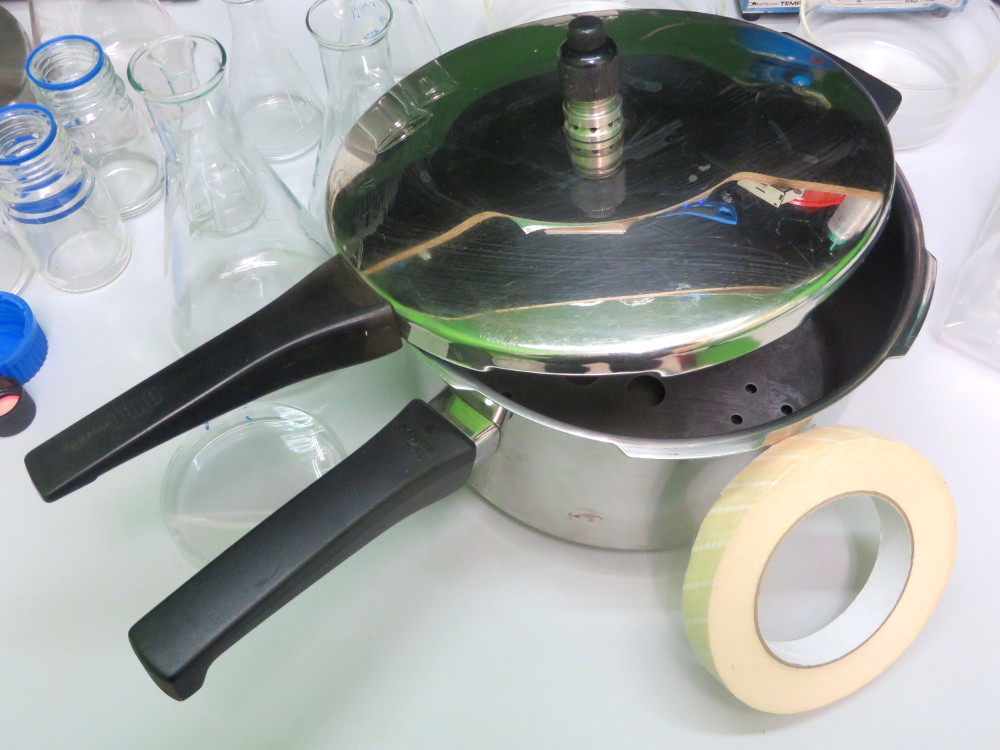
We got our steam cooker at a second hand store and replaced the sealing rubber by a new one.
A temperature of 120°C and cooking for 15-20 min is best. See here.
There is this special tape (Stefan brought it) where black stripes appear when sterilization is done.
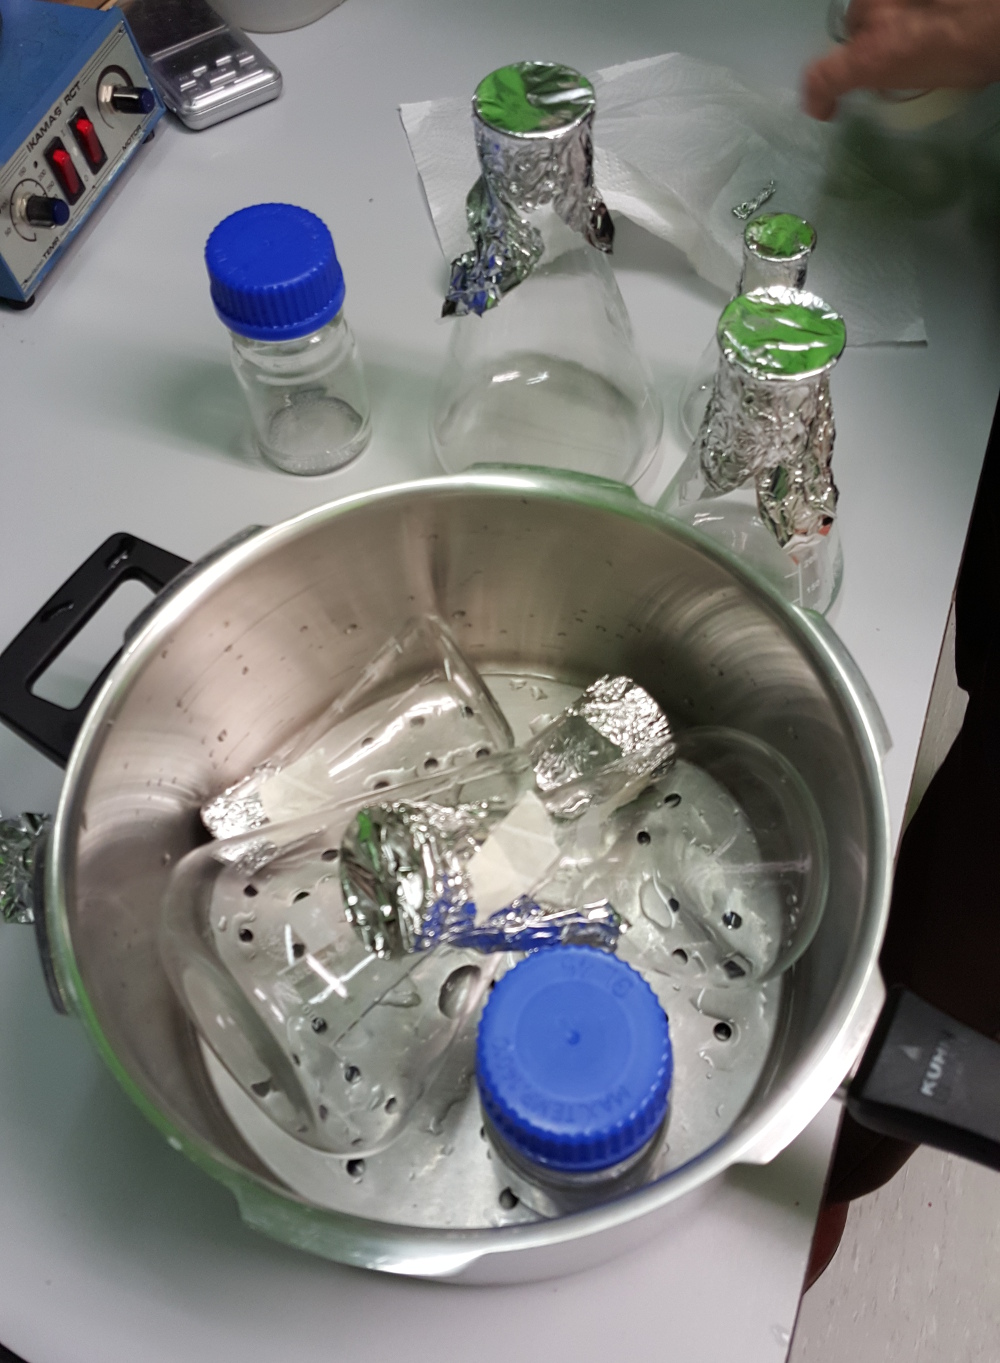
Sterilization of glass ware. Cover the top of flasks with aluminium.
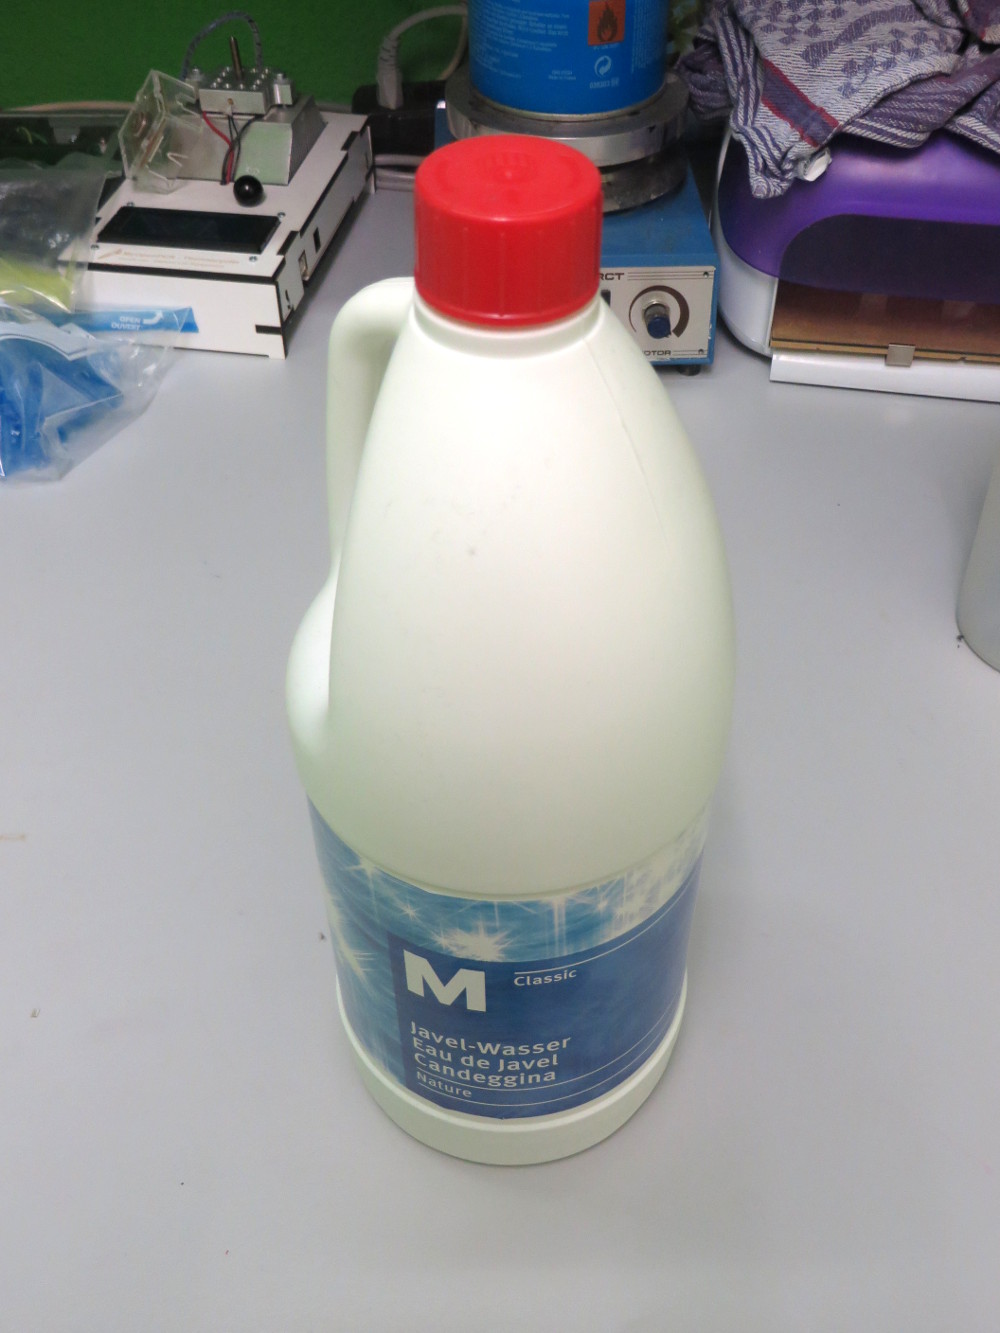
For quick sterilization of liquid cultures, bleach can be used. You get it in most supermarkets.
You also want to get some sort of waste containers to collect the used tips and tubes and glass ware for later sterilization and disposal.
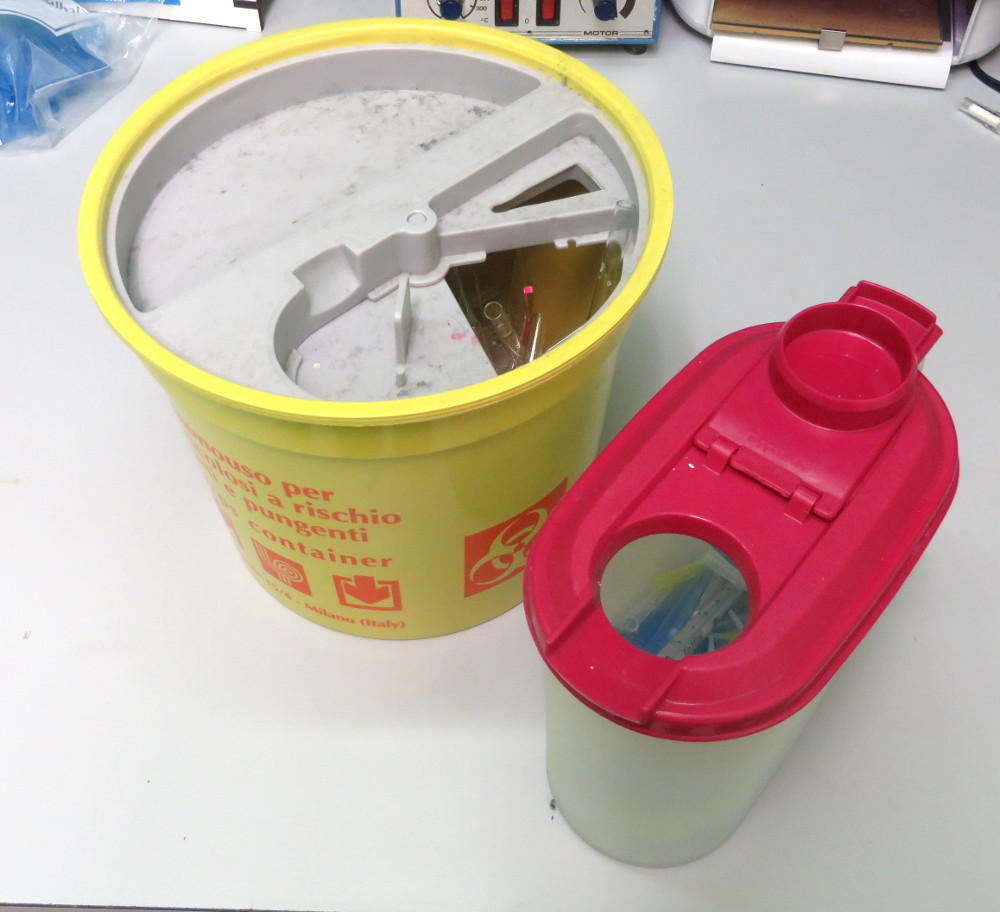
We got the "professional" one as gift and bought the other one in the second hand store.
Petri Dishes
To culture bacteria Petri dishes are commonly used (100mm diameter is standard). Plastic Petri dishes are convenient but can not be sterilized and reused. There are glass Petri dishes however.
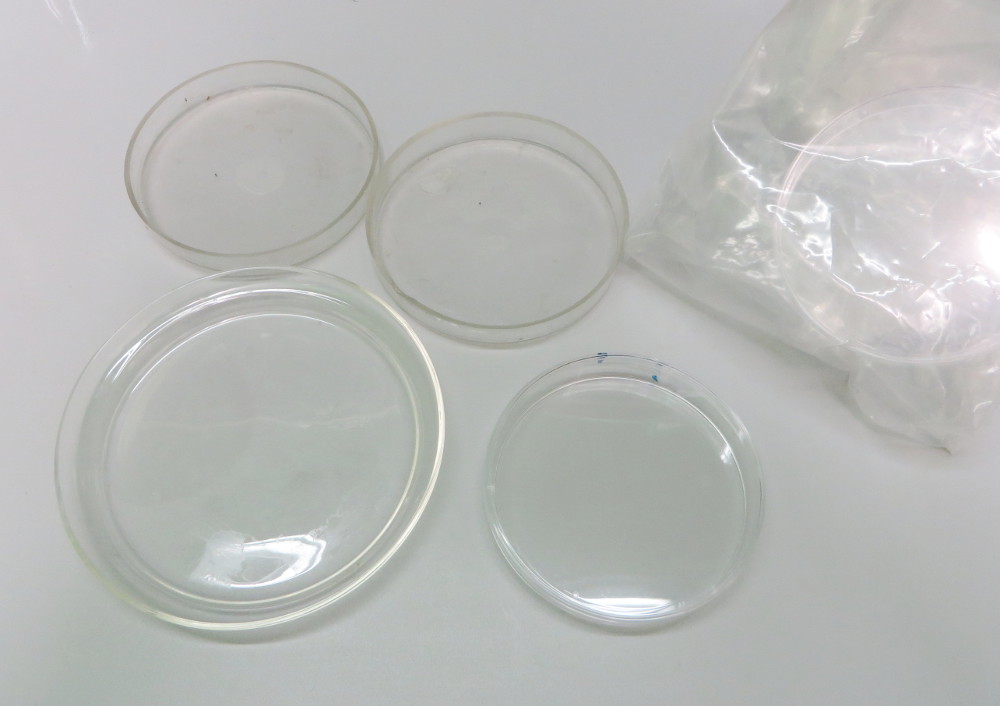
We got Petri dishes in packs of 10 in our local pharmacies. They are also easy to order from online stores.
Small tubes and racks
When working with micro size organisms you often only need small volumes. Ebbendorf tubes are standard and nice to work with. They come in different sizes and forms. Some have screw tops, those are good for storing in the fridge. Keep the tubes in sealed bags to keep them as sterile as possible. Don't reach in the bag with you hands and rather push them out one by one to avoid contamination.
Get a good pen (aceton proofe) to label them.
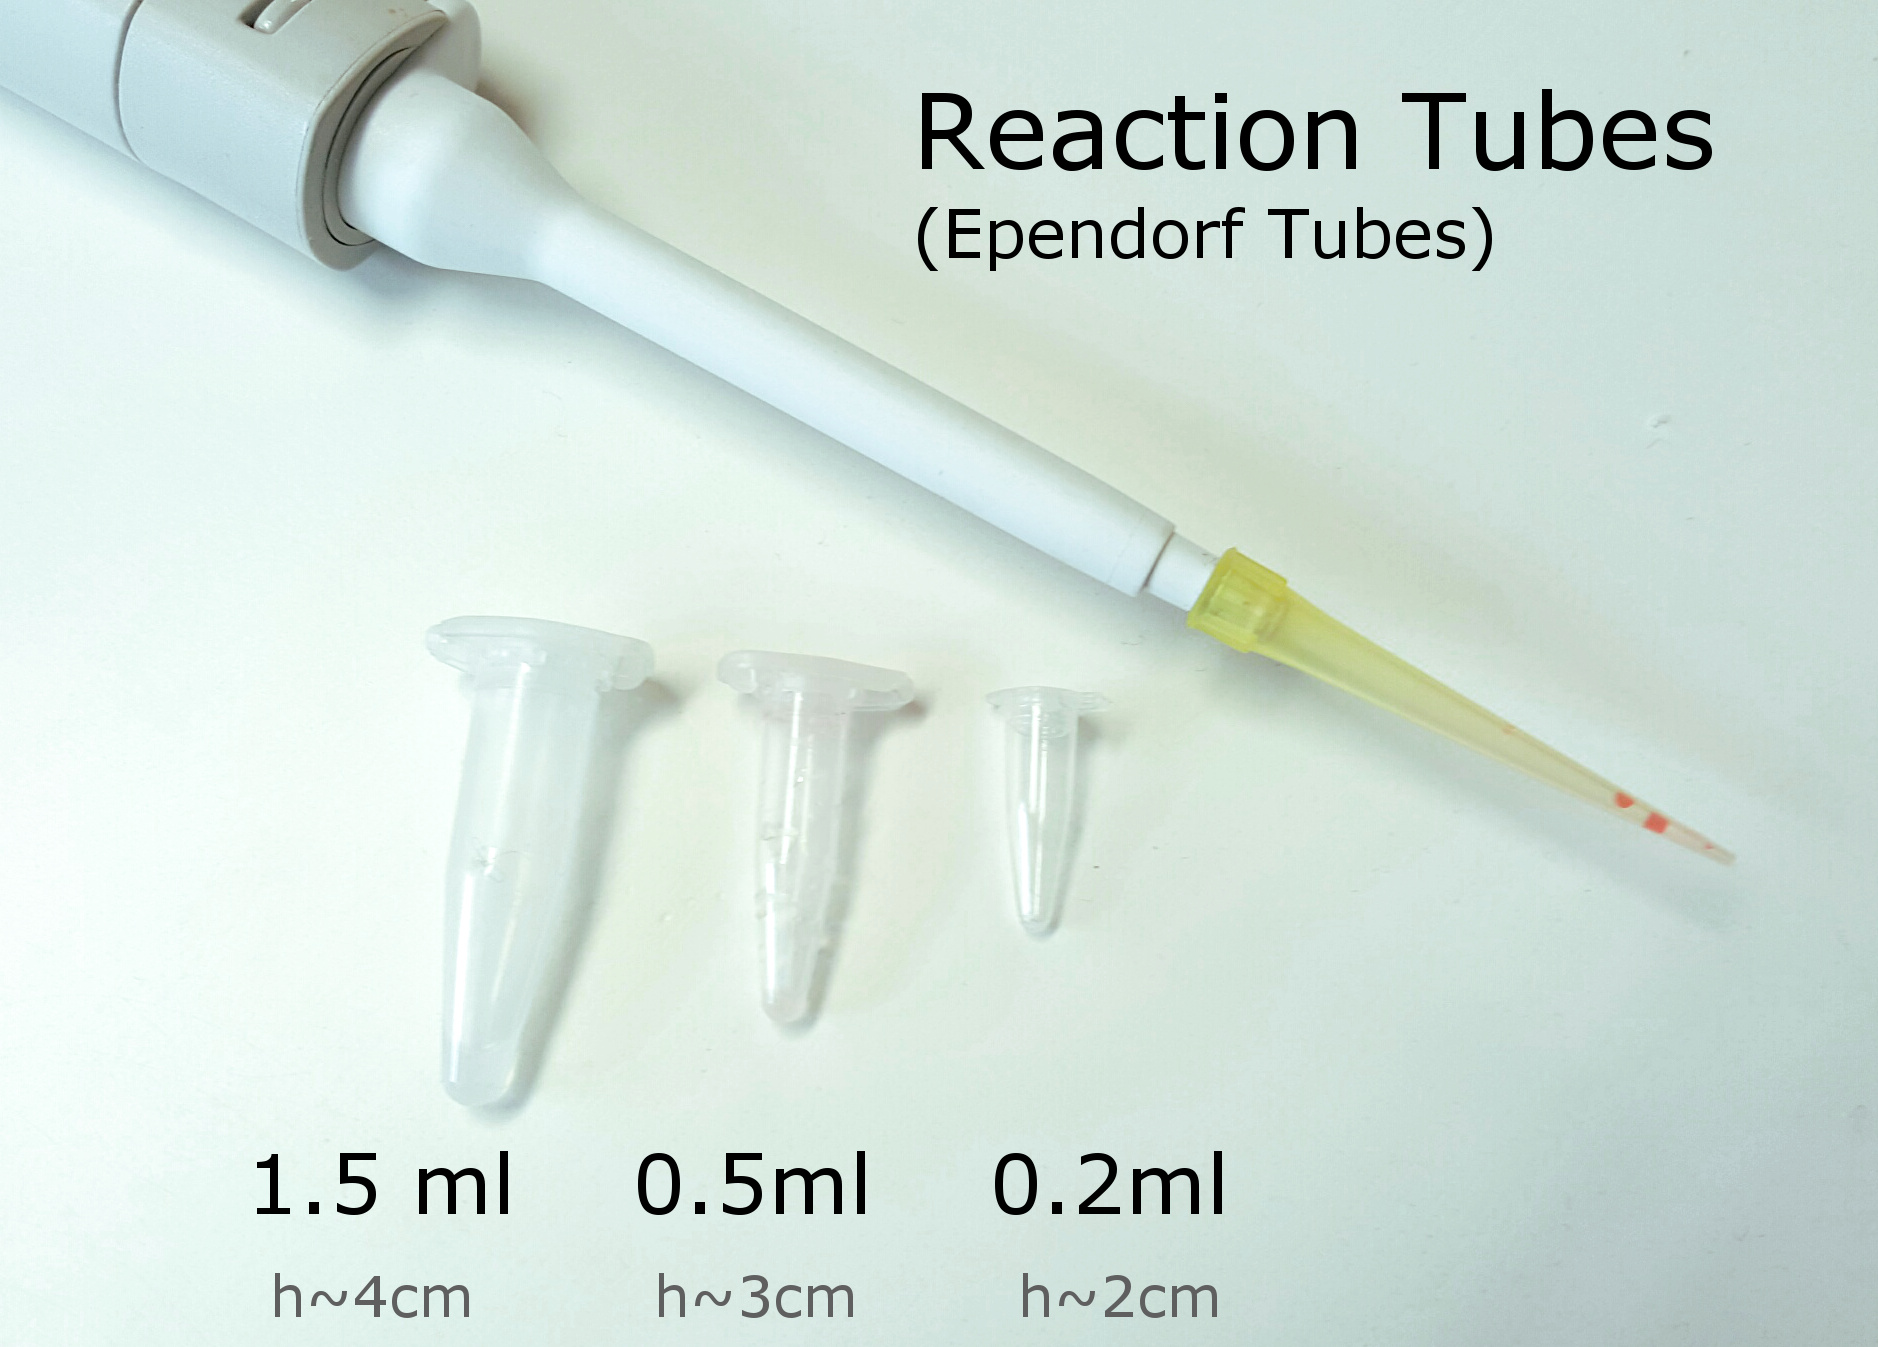
Different size of reaction tubes. 1.5ml are most standard. 0.5ml are nice too. 0.2 ml are most used for PCR.
You need a lot of racks to store the tubes. You sometimes get them as a gift (if you order a lot of expensive lab ware). Or then you can make your own. See here.
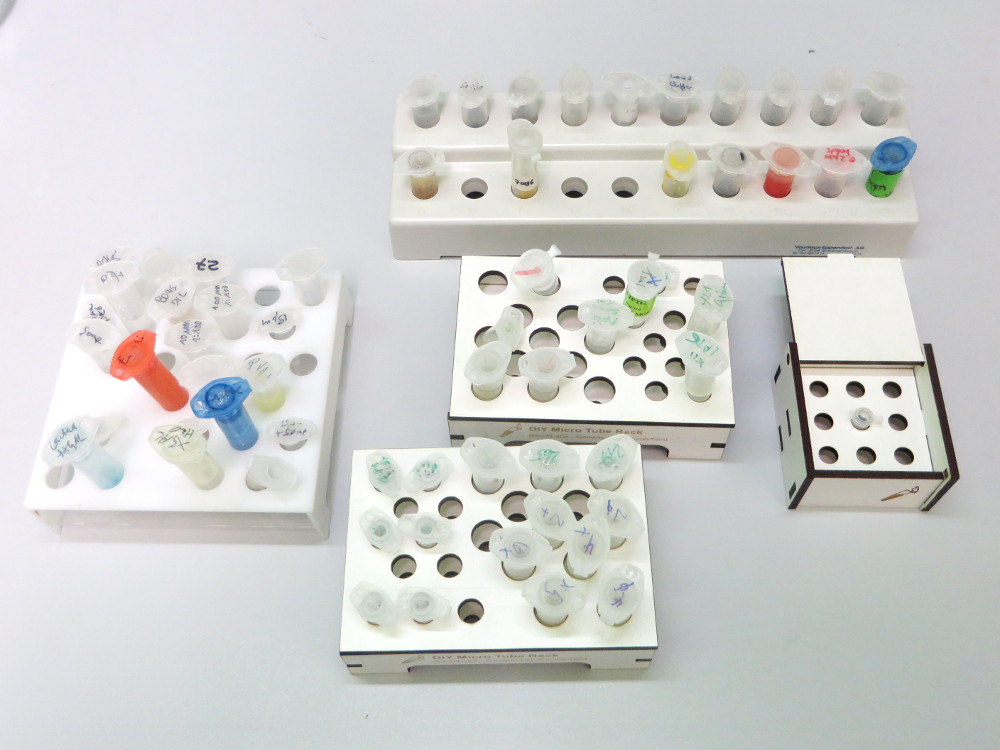
We cut them form acrylic and wood on a laser cutter in the local fablab.
Test Tubes
For bigger volumes (12ml, 15ml, 50ml) so called test tubes are available (sometimes allso called Falkon tubes). Tubes with round bottom and special (lose) cap are best for growing bacteria in the shaker.
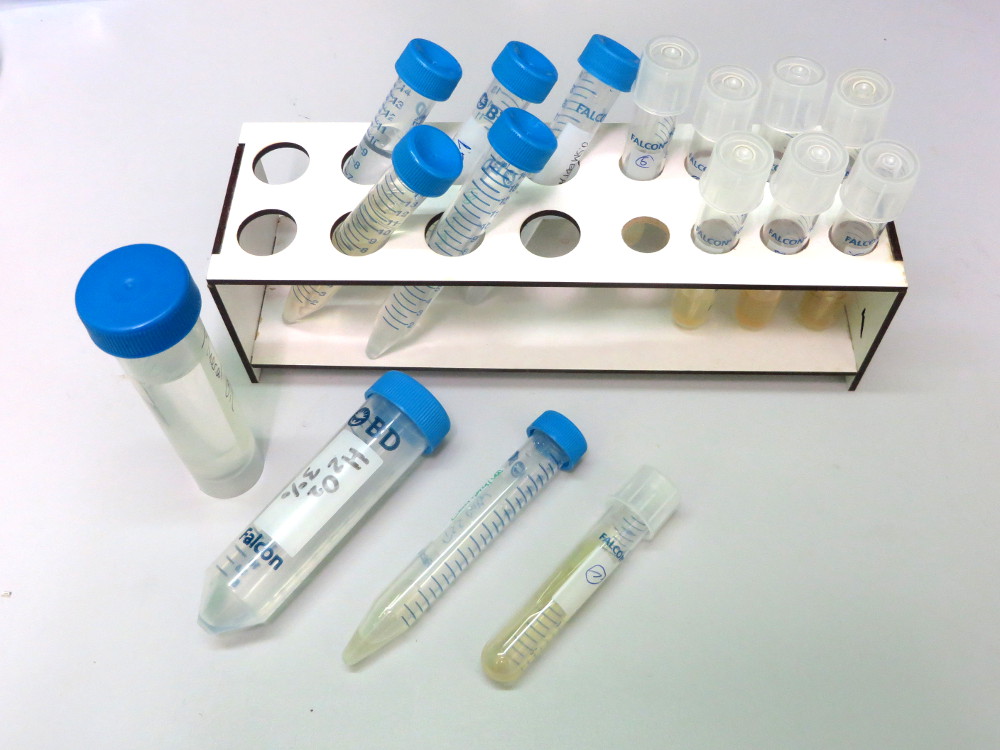
We got different types of tubes and build racks for them too.
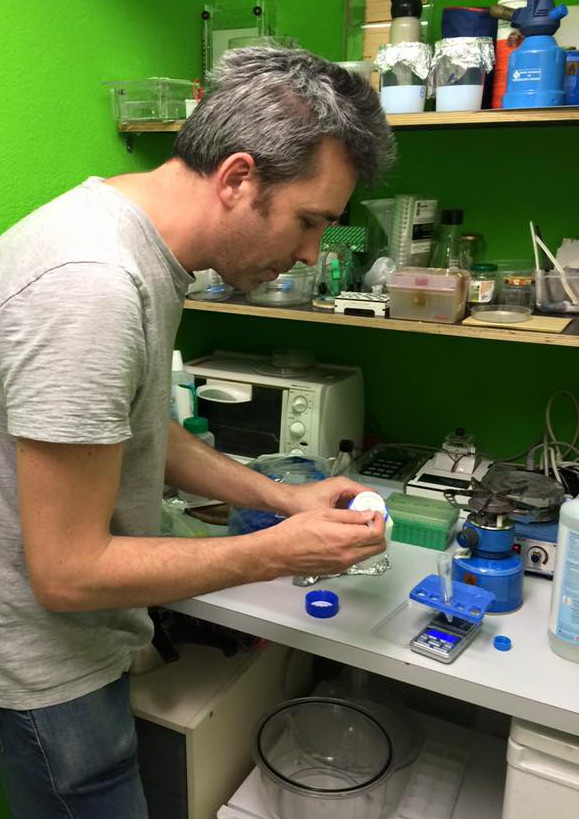
Work bench
Prepare a nice workbench to do your experiments. You usulay work standing like in a kitchen. Before starting your experiments clean the surface well with alcohol.

Working near a flame of a bunsen burner creates a local sterile environement.
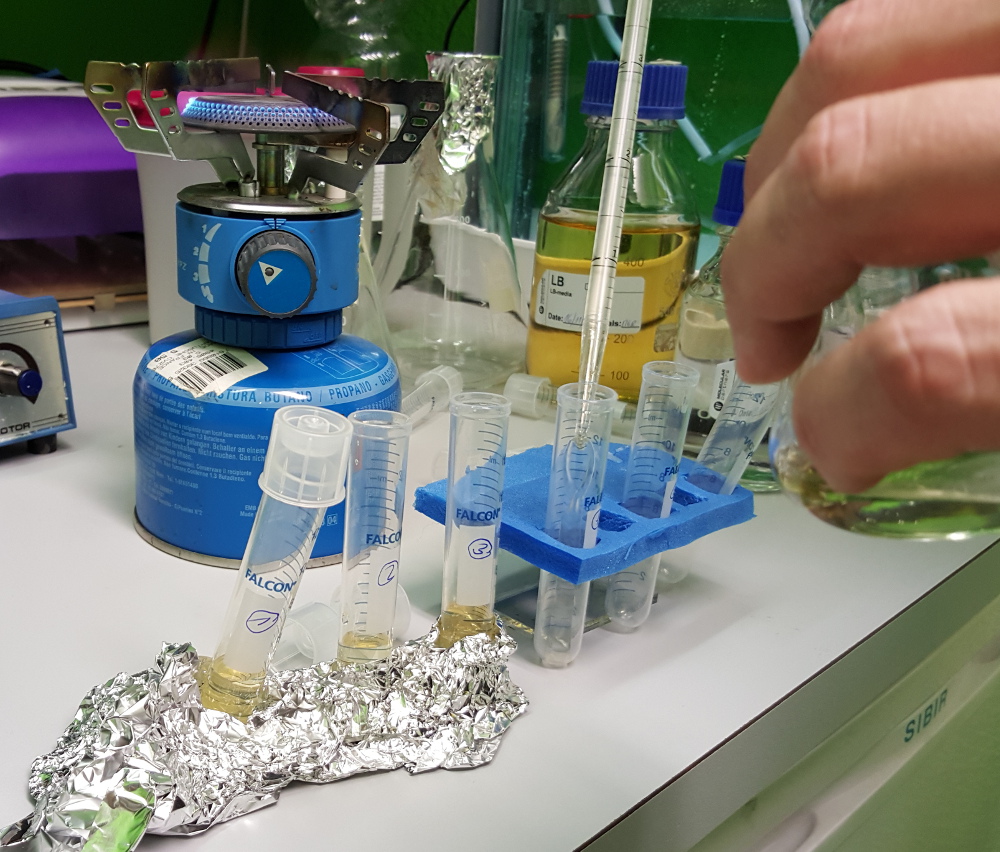
We used a camping gas burner instead.
Reagents, chemistry and biomolecules
The most difficult part in setting up a do it yourself bio lab is to get the right chemicals and biomolecules. Most companies that sell them to scientific labs usually wont ship to private persons or independent, non commercial labs. Some basic chemistry can be found on ebay. Buffers and media can be self-prepared. A great resource is the Open Wetware website where protocol and procedures are openly described. Often more simple recipes will do the trick while maybe not that effective as commercial kits. Here is what we found:Growth media
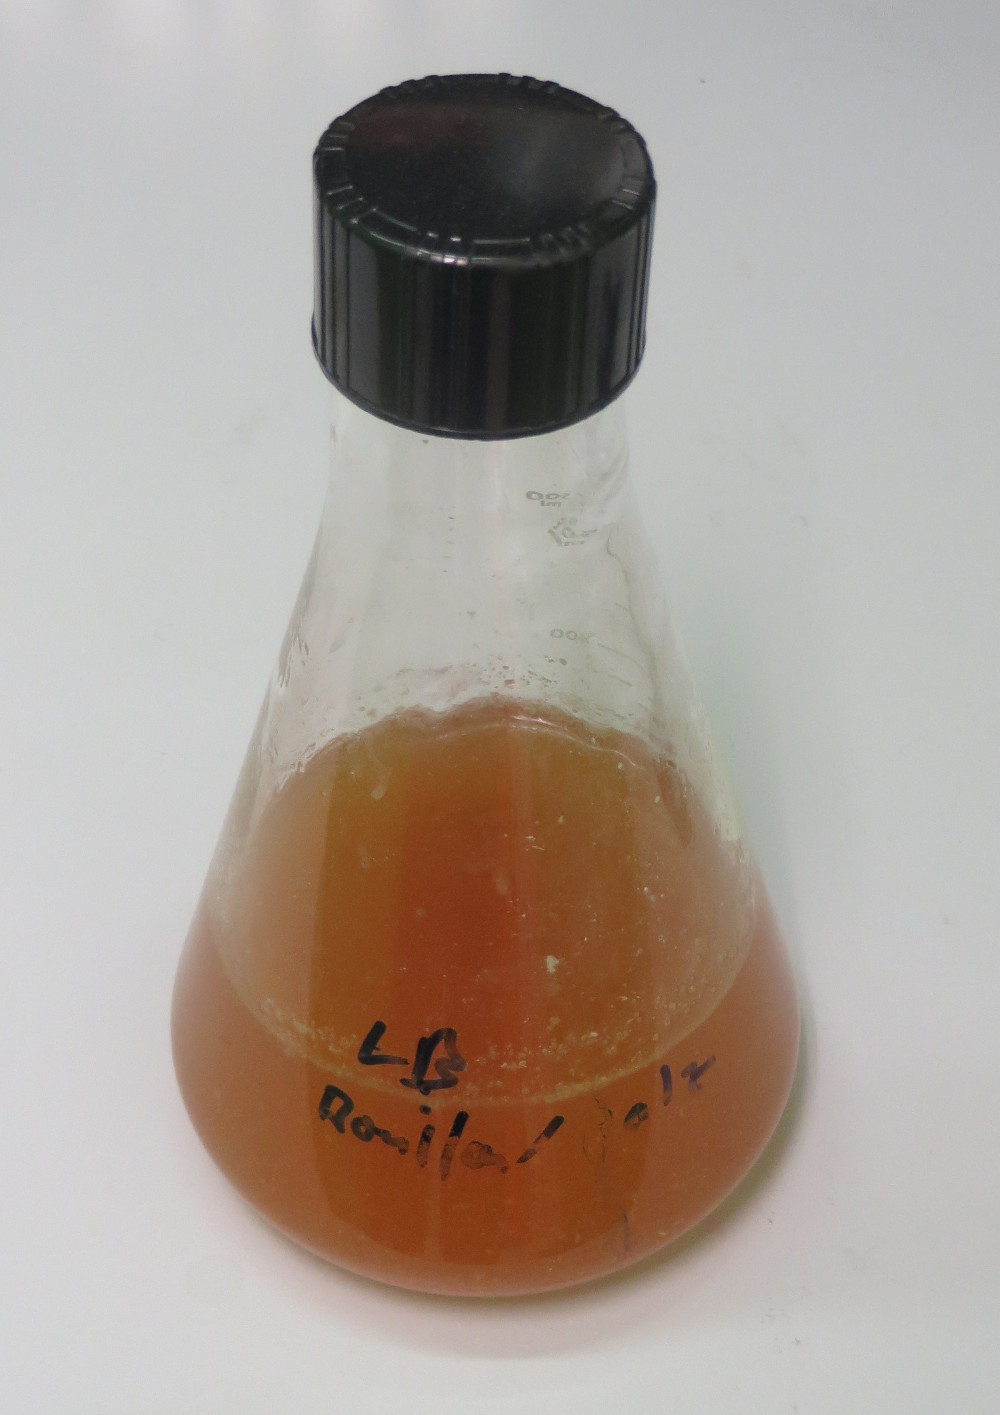
Often called LB media (Luria broth) is a nutritionally rich medium, primarily used for growing bacteria. The simplest version of it is just kitchen bouillon.
We prepared media with the following recipes:
Bouillon Liquid Media
1/4 liter water
1/2 Boillon cube
1 tsp Sugar
You can then adjust the pH of the medium to 7.0 using 1N NaOH and bring volume up to 1 liter.
Autoclave on for 20 min in steam cooker.
Store at room temperature or +4°C.
Agar Plates
For the culture plates we prepared
Boilon Agar
1/4 l water
5g Agar Agar
1 bouillon cube
2 tsp Sugar
After autoclaving, cool to approx. 55°C, add antibiotic (if needed), and pour into Petri dishes.
Let harden, then invert and store at +4°C in the dark.
Antibiotics
To select transformed bacteria (by inserted antibiotic resistance) different antibiotics are added to the medium and plates.
We tried to find Ampicillin, Kanamycin and Cindamycin. Some of these are sold on ebay (mostly China) for the treatment of pets (such as fish).
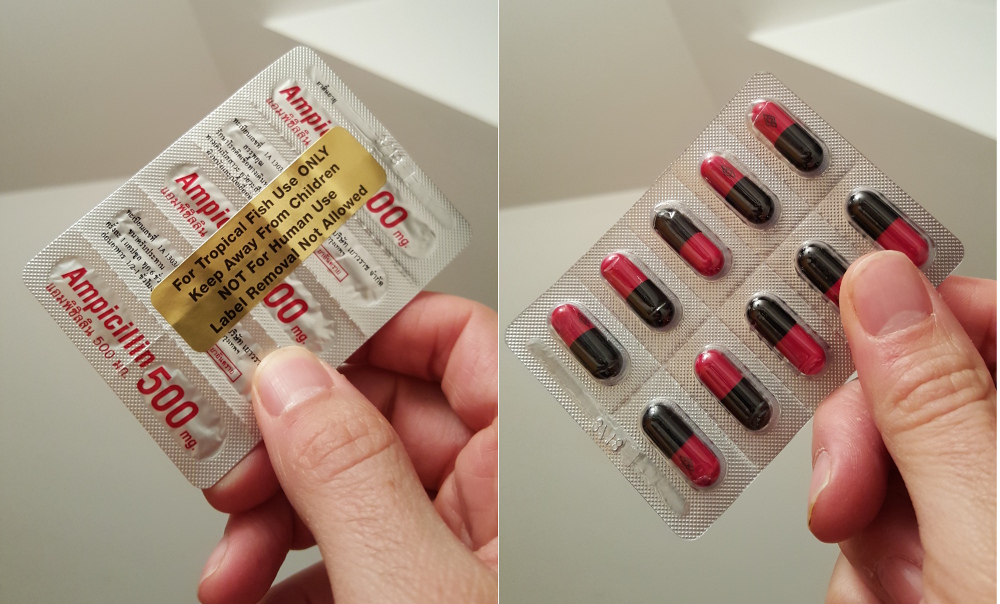
We bought 10x 500mg of Ampicillin for about 10$ on ebay.
Ultra Pure Water
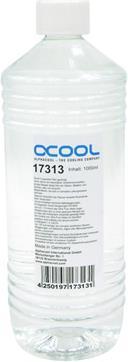
Ultrapure water, also known as "UPW" or "high-purity water", is water that has been purified to the highest levels of purity for all contaminant types, including: organic and inorganic compounds. While it is commonly used in micro biology it is not easy to get if you do not want to install a complete purification system. We found it however in computer stores where they sell it for re-filling mainboard liquid cooling systems.
Dry Ice and liquid nitrogen
For quick cooling of bacteria liquid nitrogen is commonly used in bio labs. Dry ice can also be used as an alternative. Both are available in special stores for private use. We found it in the local PanGas store where they sell it for cooling food.
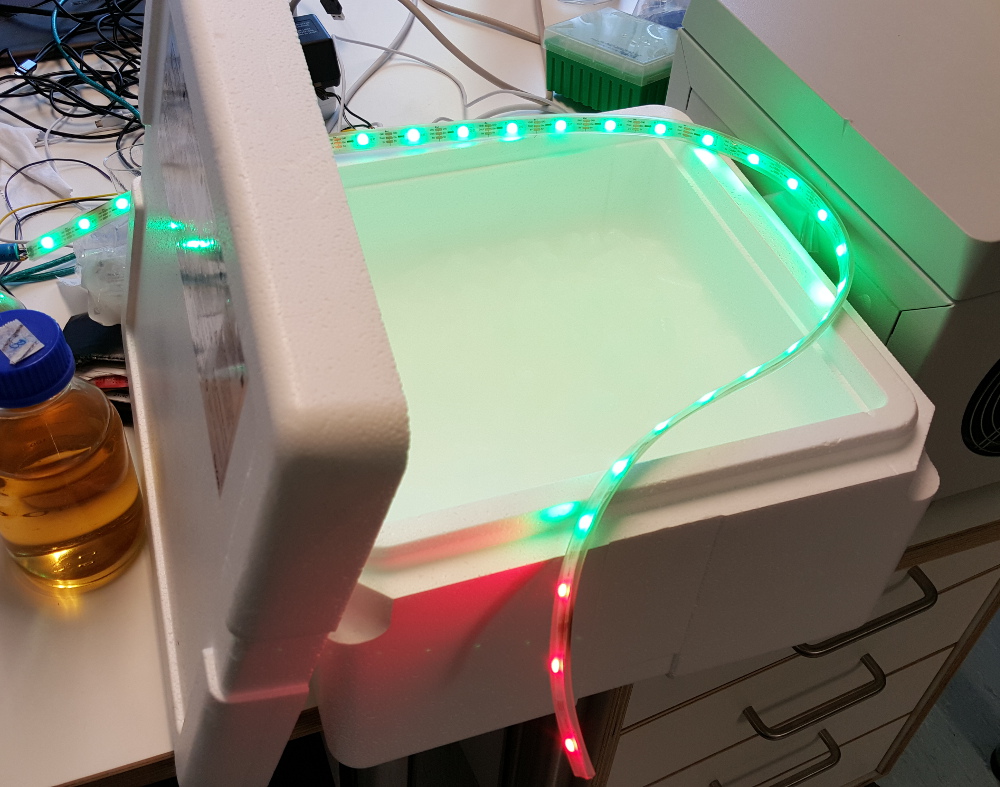
We picked up some dry ice (4kg) that we got in a special Styrofoam box (can be reused).
TSS-Buffer (Transformation Storage Solution)
TSS buffer is used to make chemically competent cells. The buffer can be prepared with this protocol from open wetware.
Preparation
To make 50 mL:
- 5g PEG 8000
- 1.5 mL 1M MgCl2 (or 0.30g MgCl2*6H20)
- 2.5 mL DMSO
- Add LB to 50 mL
Filter sterilize (0.22 μm filter)
We found all the chemistry required on ebay. PEG8000 was replaced by PEG 3000.(Did we filter and adjust PH?)
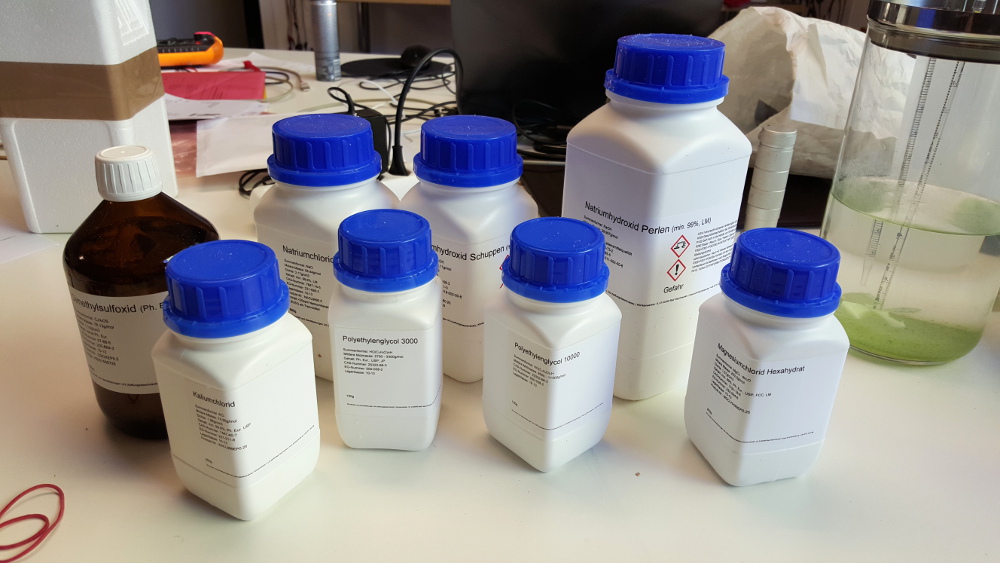
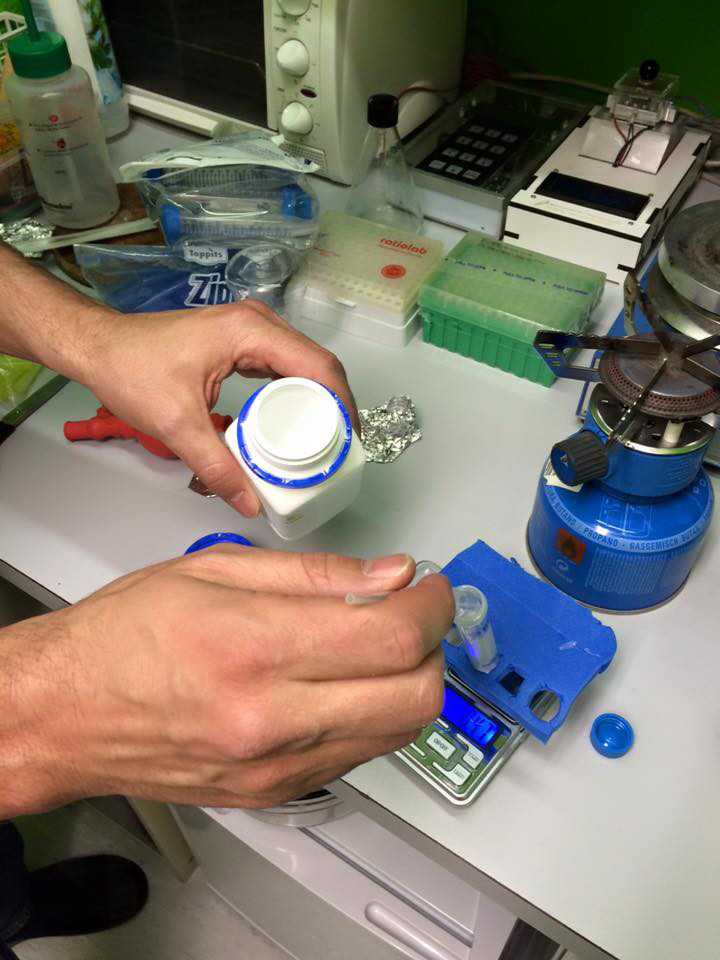
Preparing the buffers in the lab.
Ordering Plasmids:
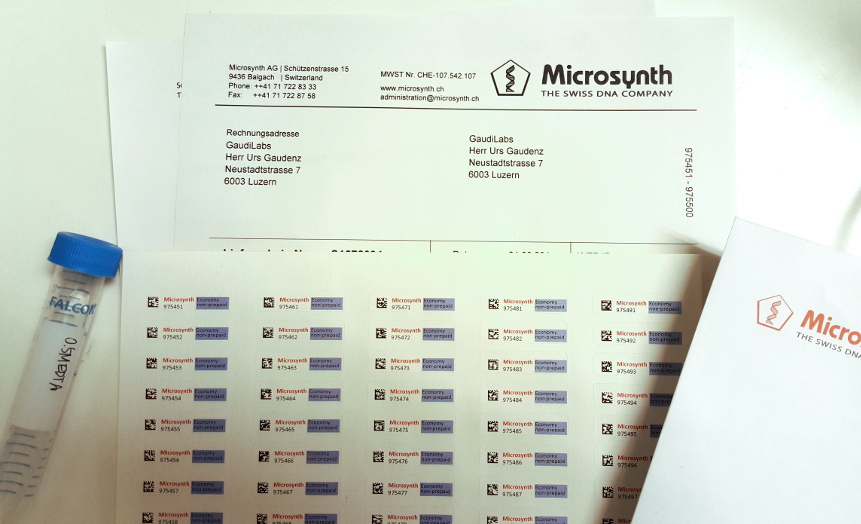
Getting ready to order DNA - http://www.microsynth.ch/
Lab devices for microbiology
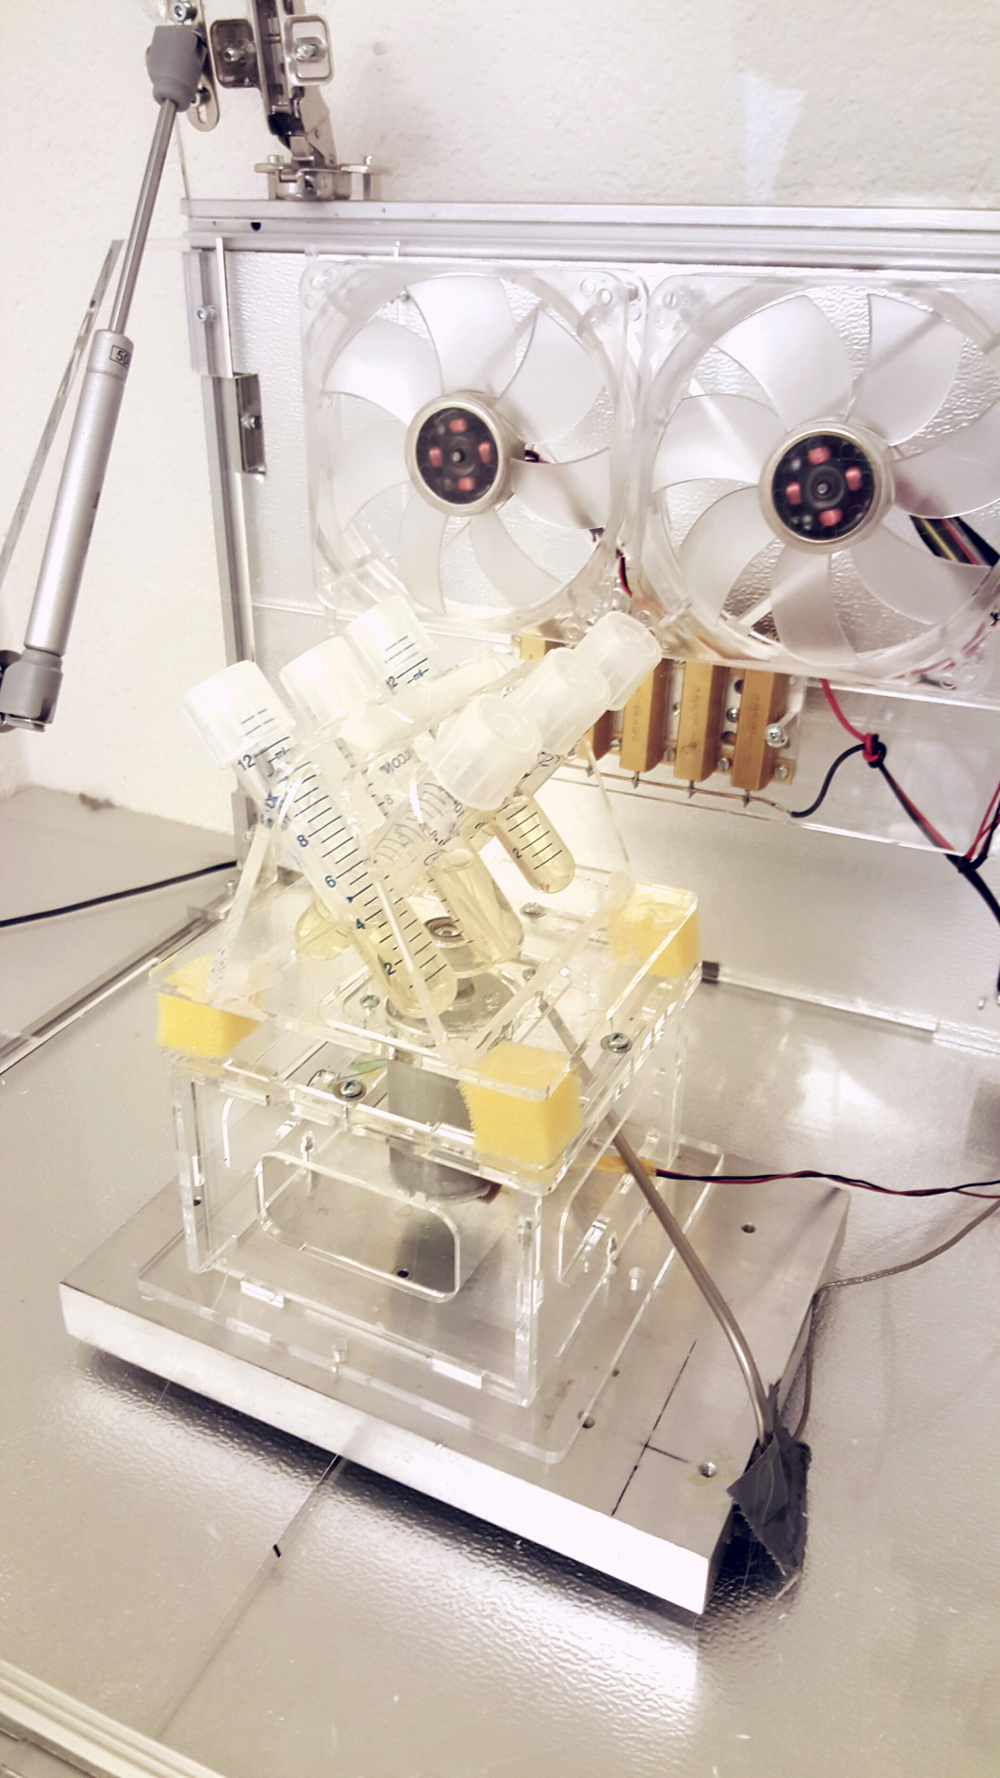
To grow cells and monitor their growth and characteristics some specific lab devices are useful. Incubators are essential for a lot of experimental work in microbiology and molecular biology as they maintain optimal temperature, humidity and other conditions. A shaker or mixer is a device used to stir or mix substances in the temperature controlled environment during incubation. And a turbidity meter is used to determine the growth of the liquid culture. While most of these devices are quite expensive when bought from commercial companies they are technically quite easy to build. So we made our own:DIY-Incubator-Shaker
Incubators can be built in different forms. Some of the easiest build are just a Styrofoam box with a simple heating element or even just a warm object placed inside. To keep the temperature stable at a defined point an active temperature regulation can be added. A cheap commercial version is a simple chicken egg incubators. While most incubators are more like a cabinet, some are combined with a shaker and have a special lid and make it easier to access and manipulate on the inside. We built one of these.
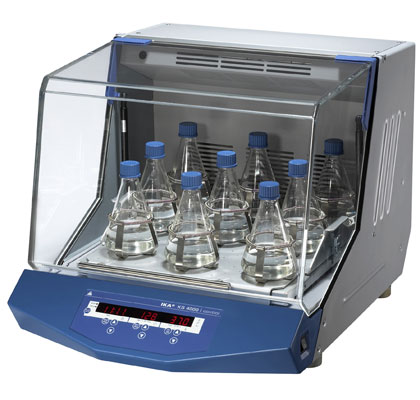
Commercial Shaker-Incubator
We designed the DIY-Incubator-Shaker from 20mm aluminum profiles to form the frame structure and laser cut acrylic plates for the sides and the lid. The temperature control is realized with a hacked IKEA thermometer and some big electric resistors for heating. Two PC ventilators circulate the air for a homogenous temperature distribution.
The incubator was designed in Solid-Works and the blueprint for the parts are open source and can be downloaded as DWG files here.
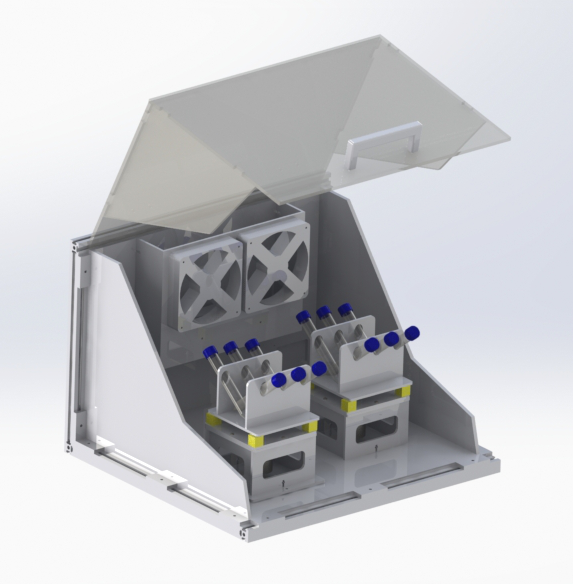
Rendering of the DIY-Incubator-Shaker
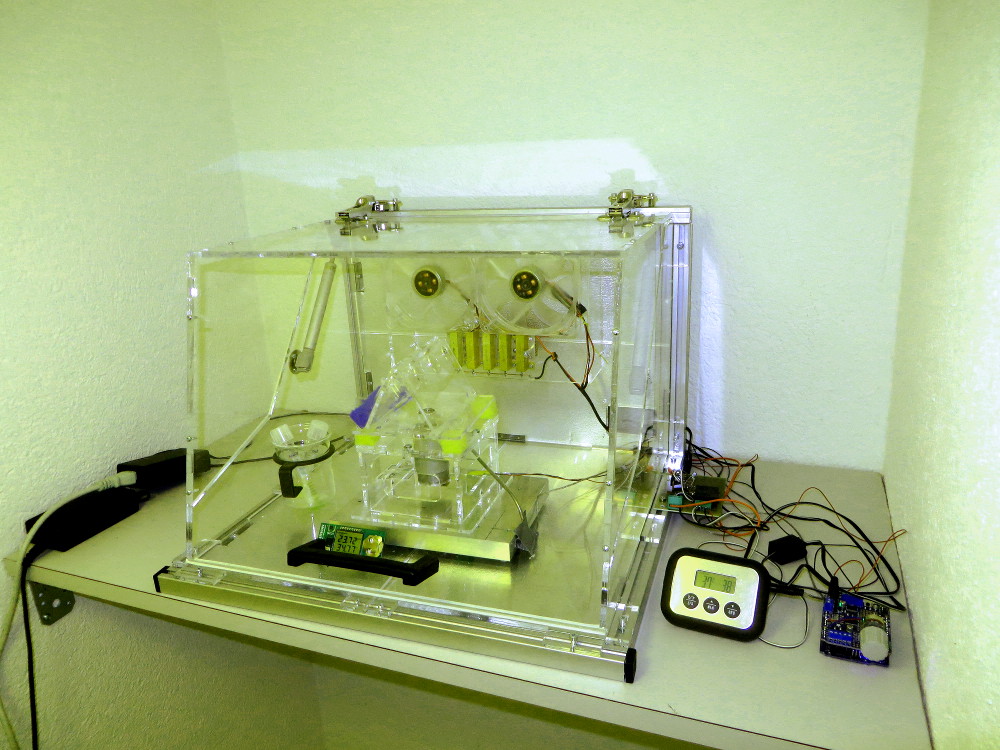
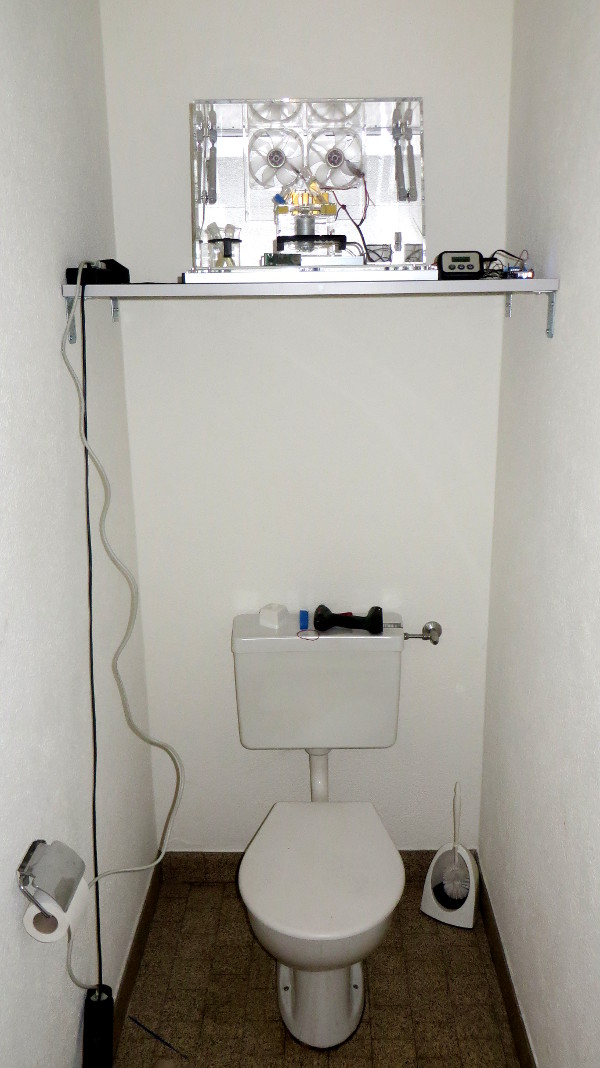
DIY Incubartor-Shaker installed.
DIY Shaker
The shaker agitates the held in beakers, jars, erlenmeyer flasks, tubes or vials that are placed on the table. The design is an orbital shaker that shake the vessel in a circular fashion. The shaker is built from laser cut acrylic with a table board that oscillates horizontally, powered by an electric motor (harvested from a laser printer). The circular horizontal movement is supported by four foam cubes. We found this to be a very cheap and reliable solution.
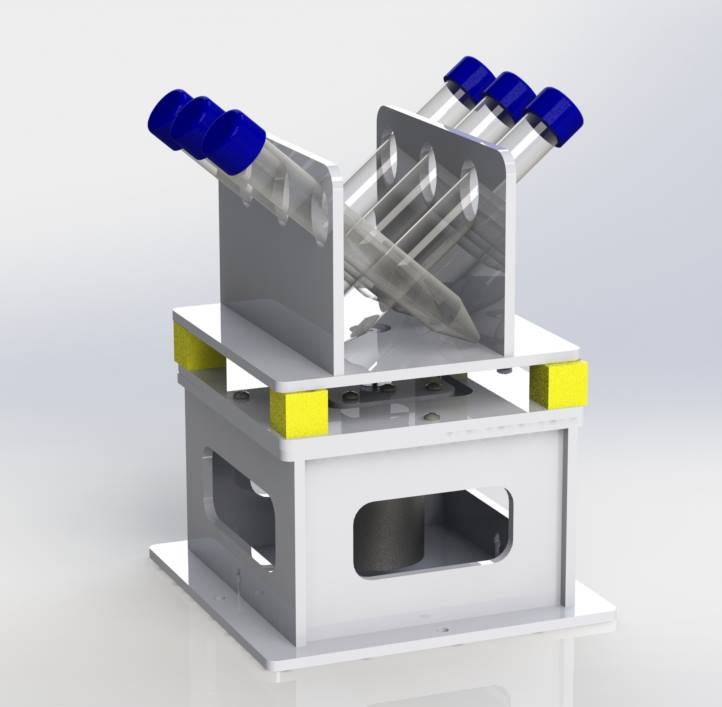
DIY orbital Shaker.
DIY Orbital shaker placed in the incubator chamber.
Design files for the DIY Orbital shaker are open source and can be downloaded here.
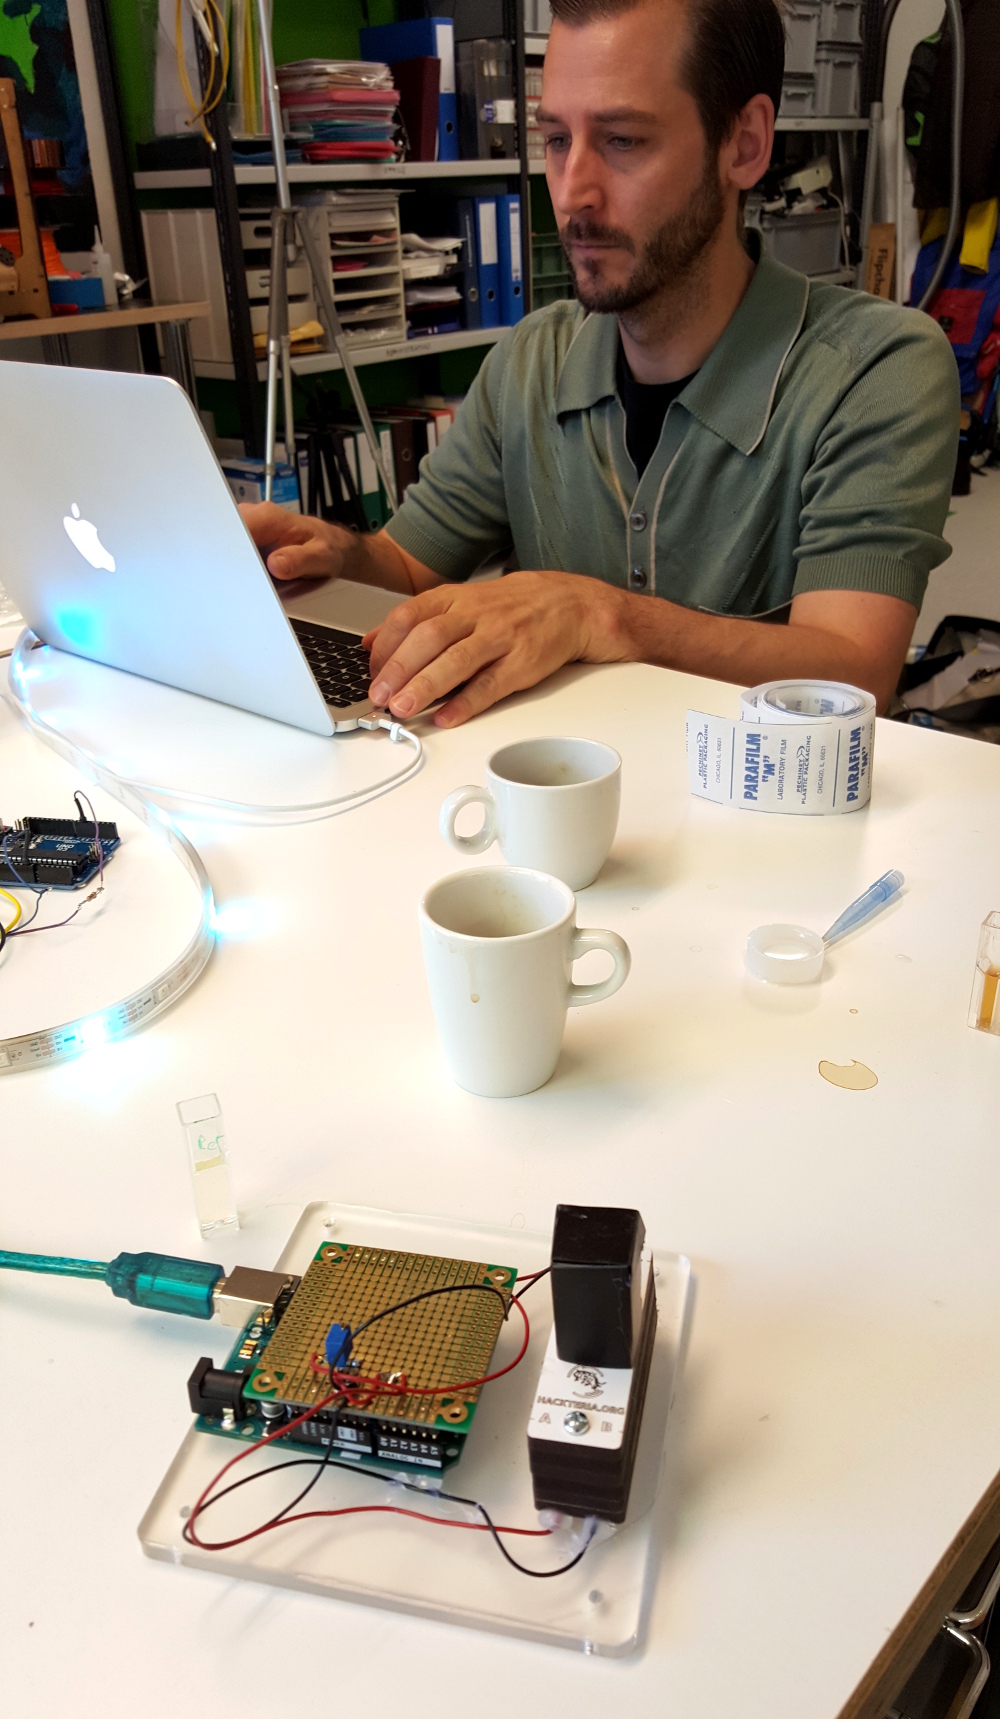
DIY Turbidity Meeter (OD Meeter)
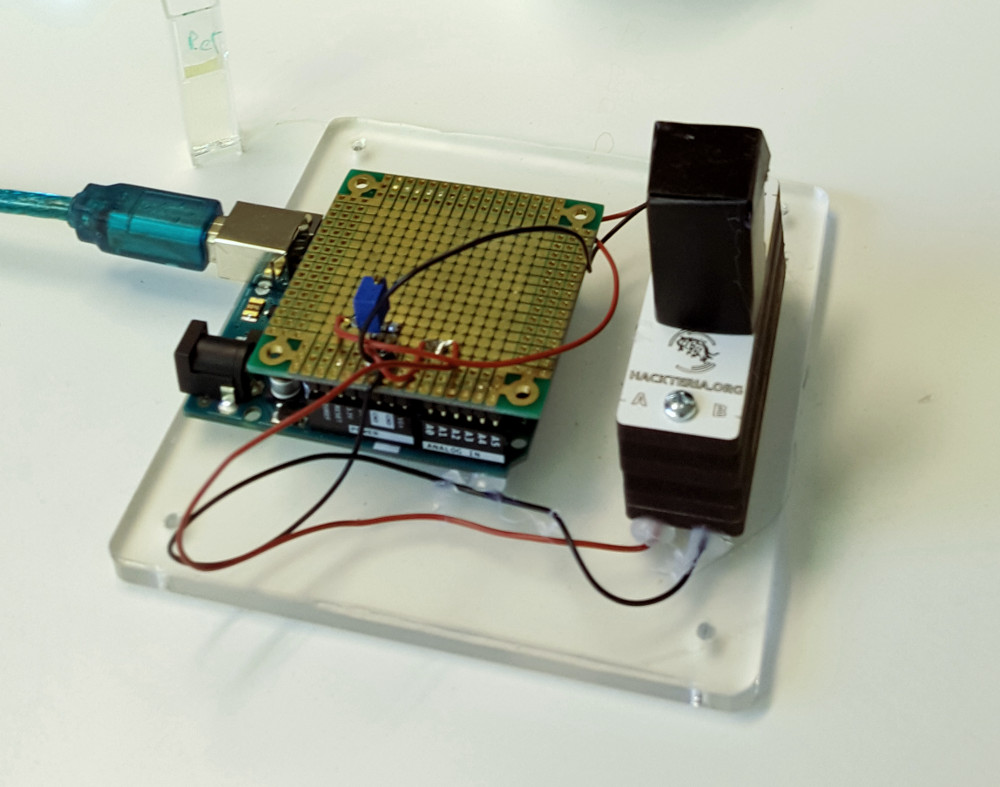
The simple turbidity meter serves to measure the absorption of light in test vials. The optical density (OD) determined gives an indication on bacterial growth or protein and DNA concentration. The turbidity meter is built around a light emitting diode (LED) and a light sensor (LDR). The voltage from the light sensor is read by an arduinio microcontroller platform and normalized with a logarithmic function. OD readings are output on the computer. For more info see here.
DIY Fluorimeeter
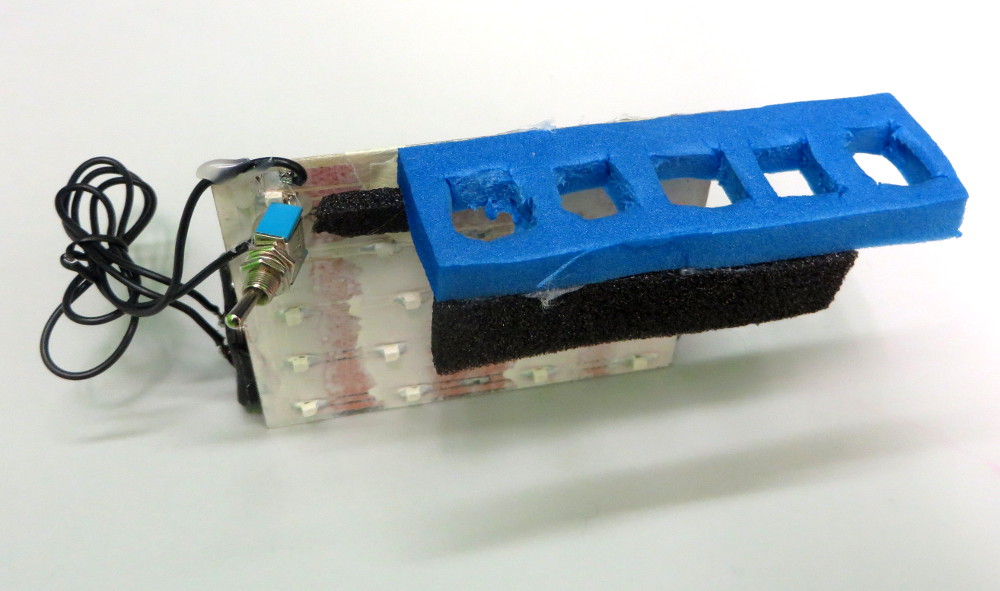
A simple DIY Fluorimeeter was built to compare fluorescent bacteria in different vials. The vials can be placed in holders. LEDs placed behind the vials excitate the fluorescent proteins. With a camera placed in front of the device pictures can be taken of the vials under test.
Cetnrifuge
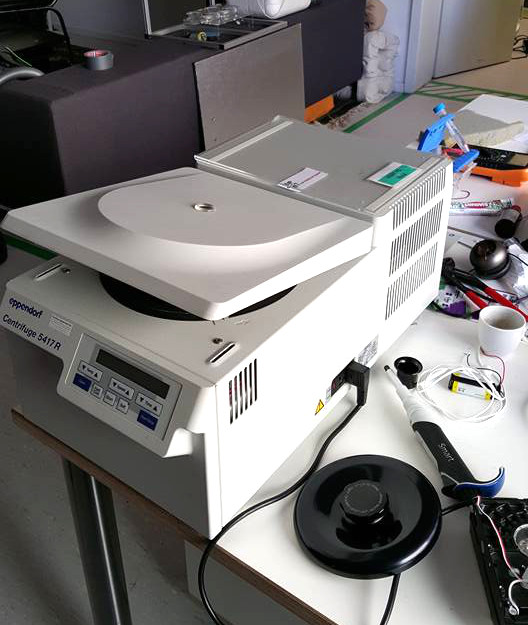
We decided to buy an Eppendor 5417R centrifuge. Got it for 150 CHF at Smiples.
Microorganism and live stock
With the lab and the chemicals ready, we now prepared stock of competent bacteria. We want to make our own glycerol stocks of DNA plasmids by transforming the DNA into competent cells. We used this protocol from Open Wetware to prepare the competent bacteria.Bacteria on stock (brought in by Stefan):
- Escherichia coli strain BS21
- Escherichia coli strain X1blue
Preparing chemically competent cells

The plan.
Protocoll
- Pellet 1 ml of cells at A600 ~ 0.3 in 1.5 ml microcentrifuge tubes.
- Remove the supernatant, add 0.1 ml of ice-cold 1X TSS, and gently resuspend the cells. Cells can be frozen at this point and stored at -70°C for later use.
- Add 100 pg-10 ng of transforming DNA.
- Mix the cells and DNA and place on ice for 10 minutes, then at room temperature for 10 minutes, and then again on ice for 10 minutes.
- Add 1 ml of LB broth and incubate the tubes at 37°C for 1 hour.
- Plate the cells on the appropriate selective or differential media.
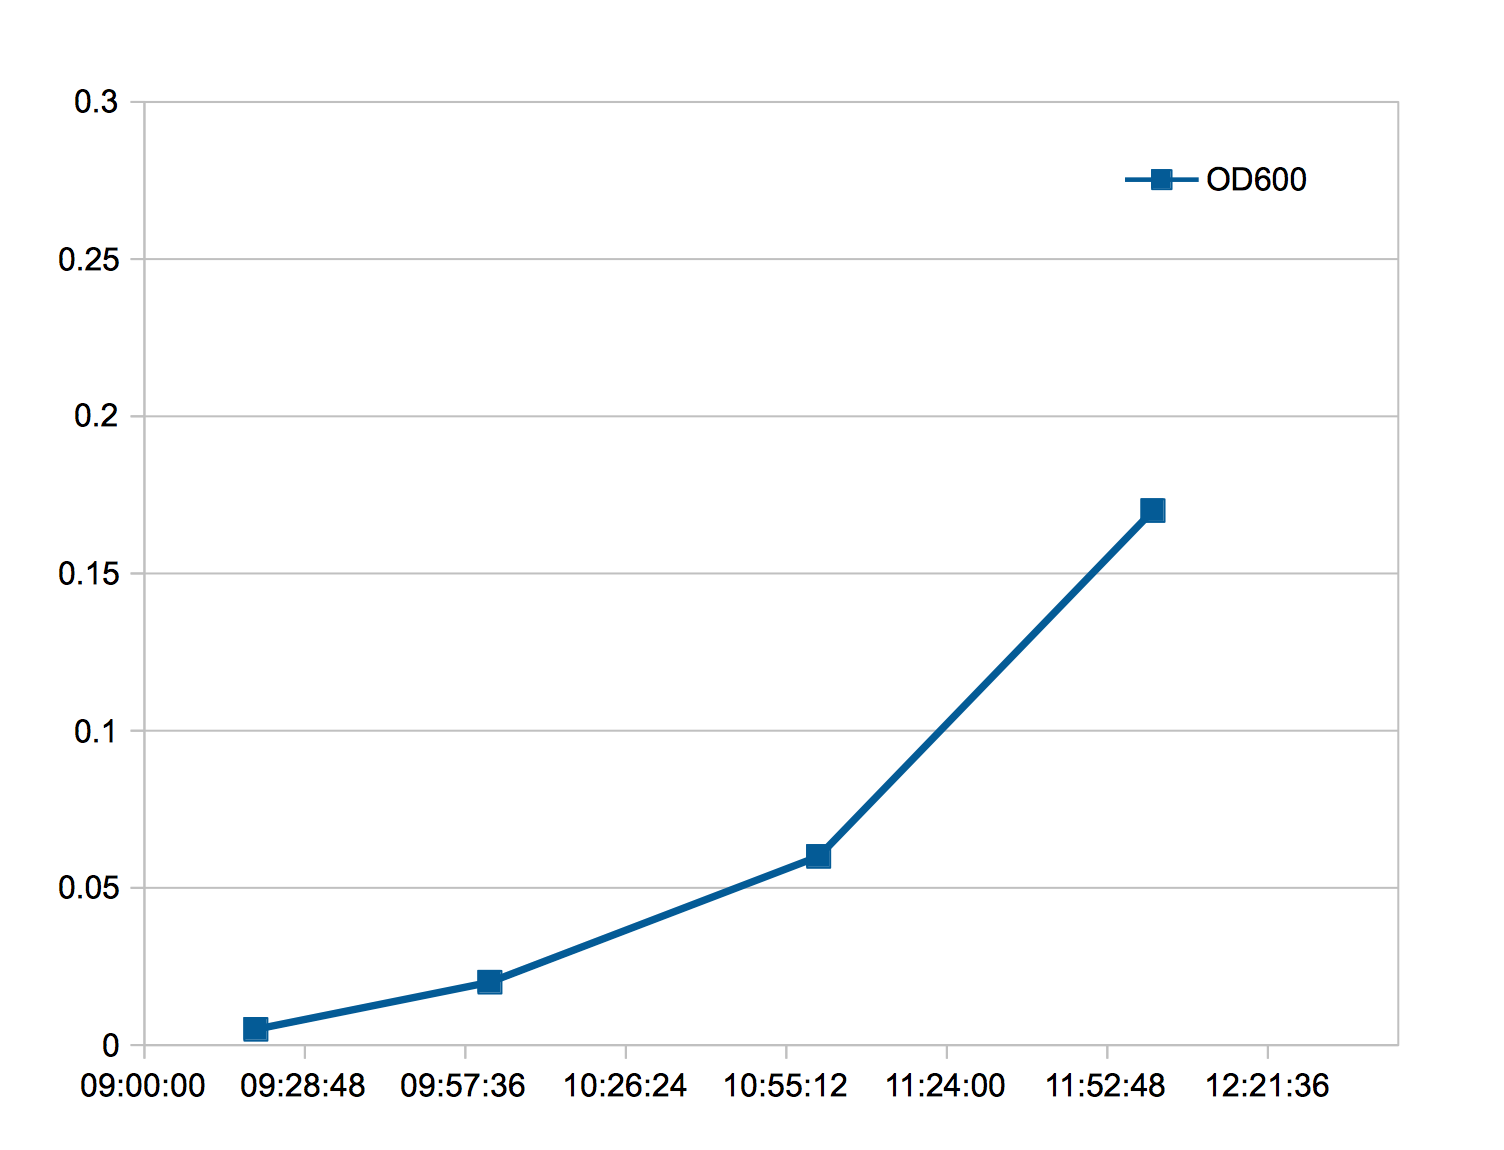
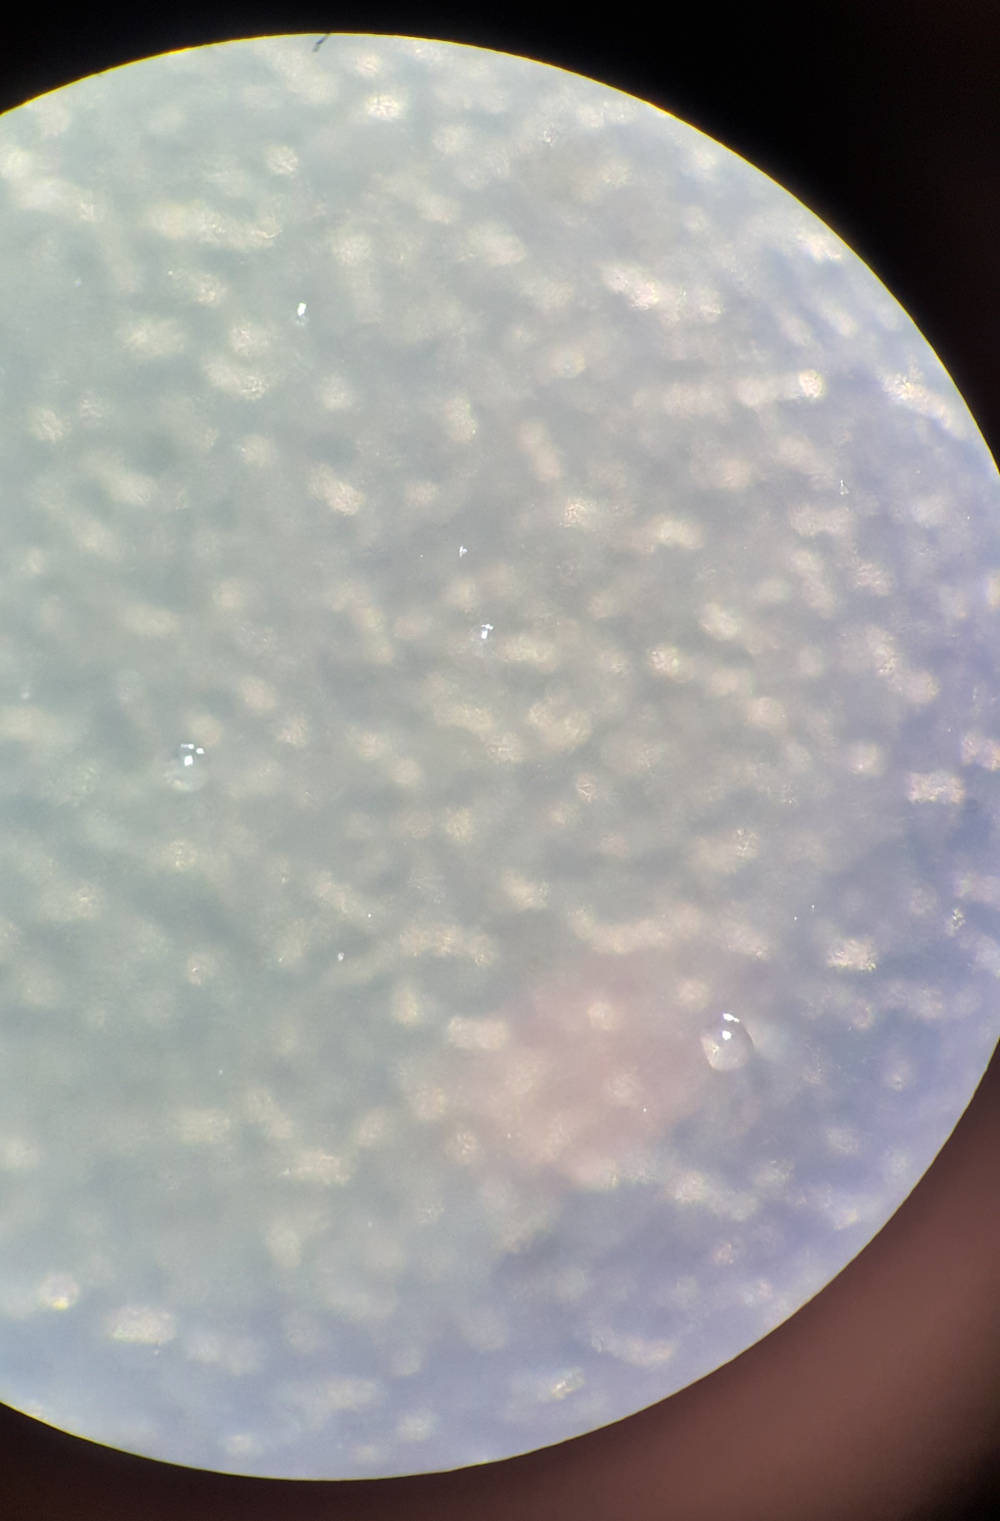
Growing bacterias in incubator, measuring OD to ~ 0.3
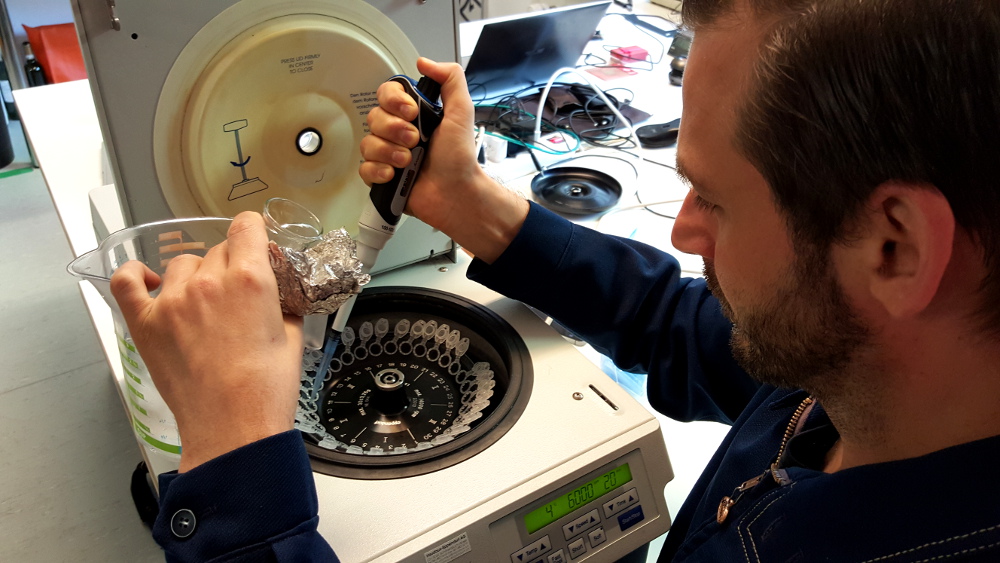
Centrifuge bacteria in 40 ebbendorf tubes, remove the supernatant, add TSS buffer resuspend the cells
Then freez on dry ice.
Testing the competent ecoli
We have prepared 40x 100ul aliquots of potentialy competent cells form strain BS21 and XL1blue . To test if the preparation was successfull we tested with a fluerescence plasmid (265 GFP).
To transfrom the cells we used the protocoll for Transforming chemically competent cells
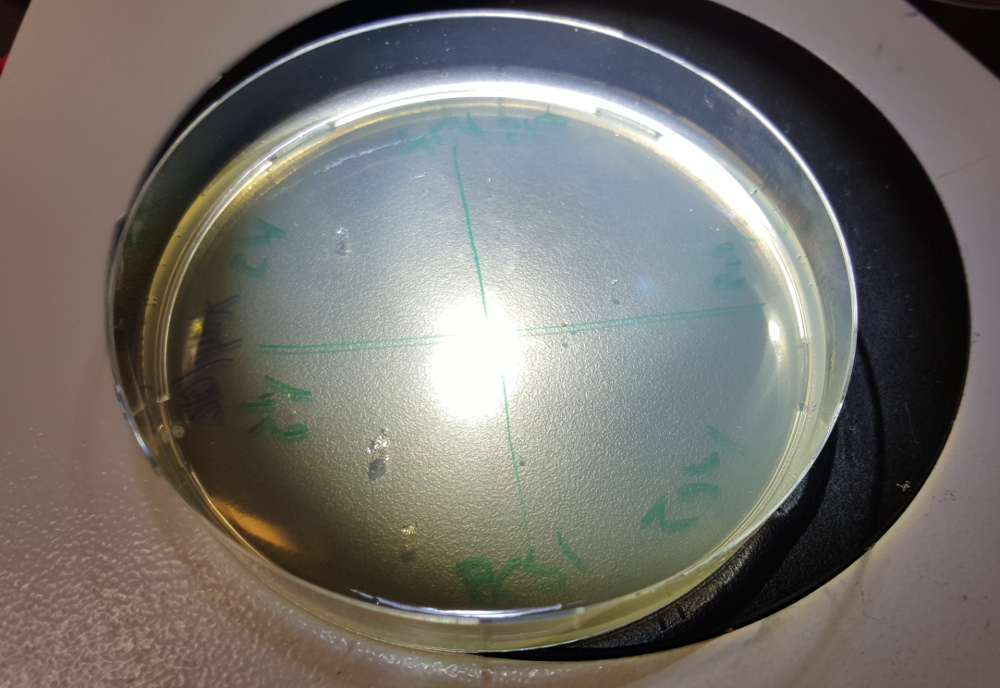
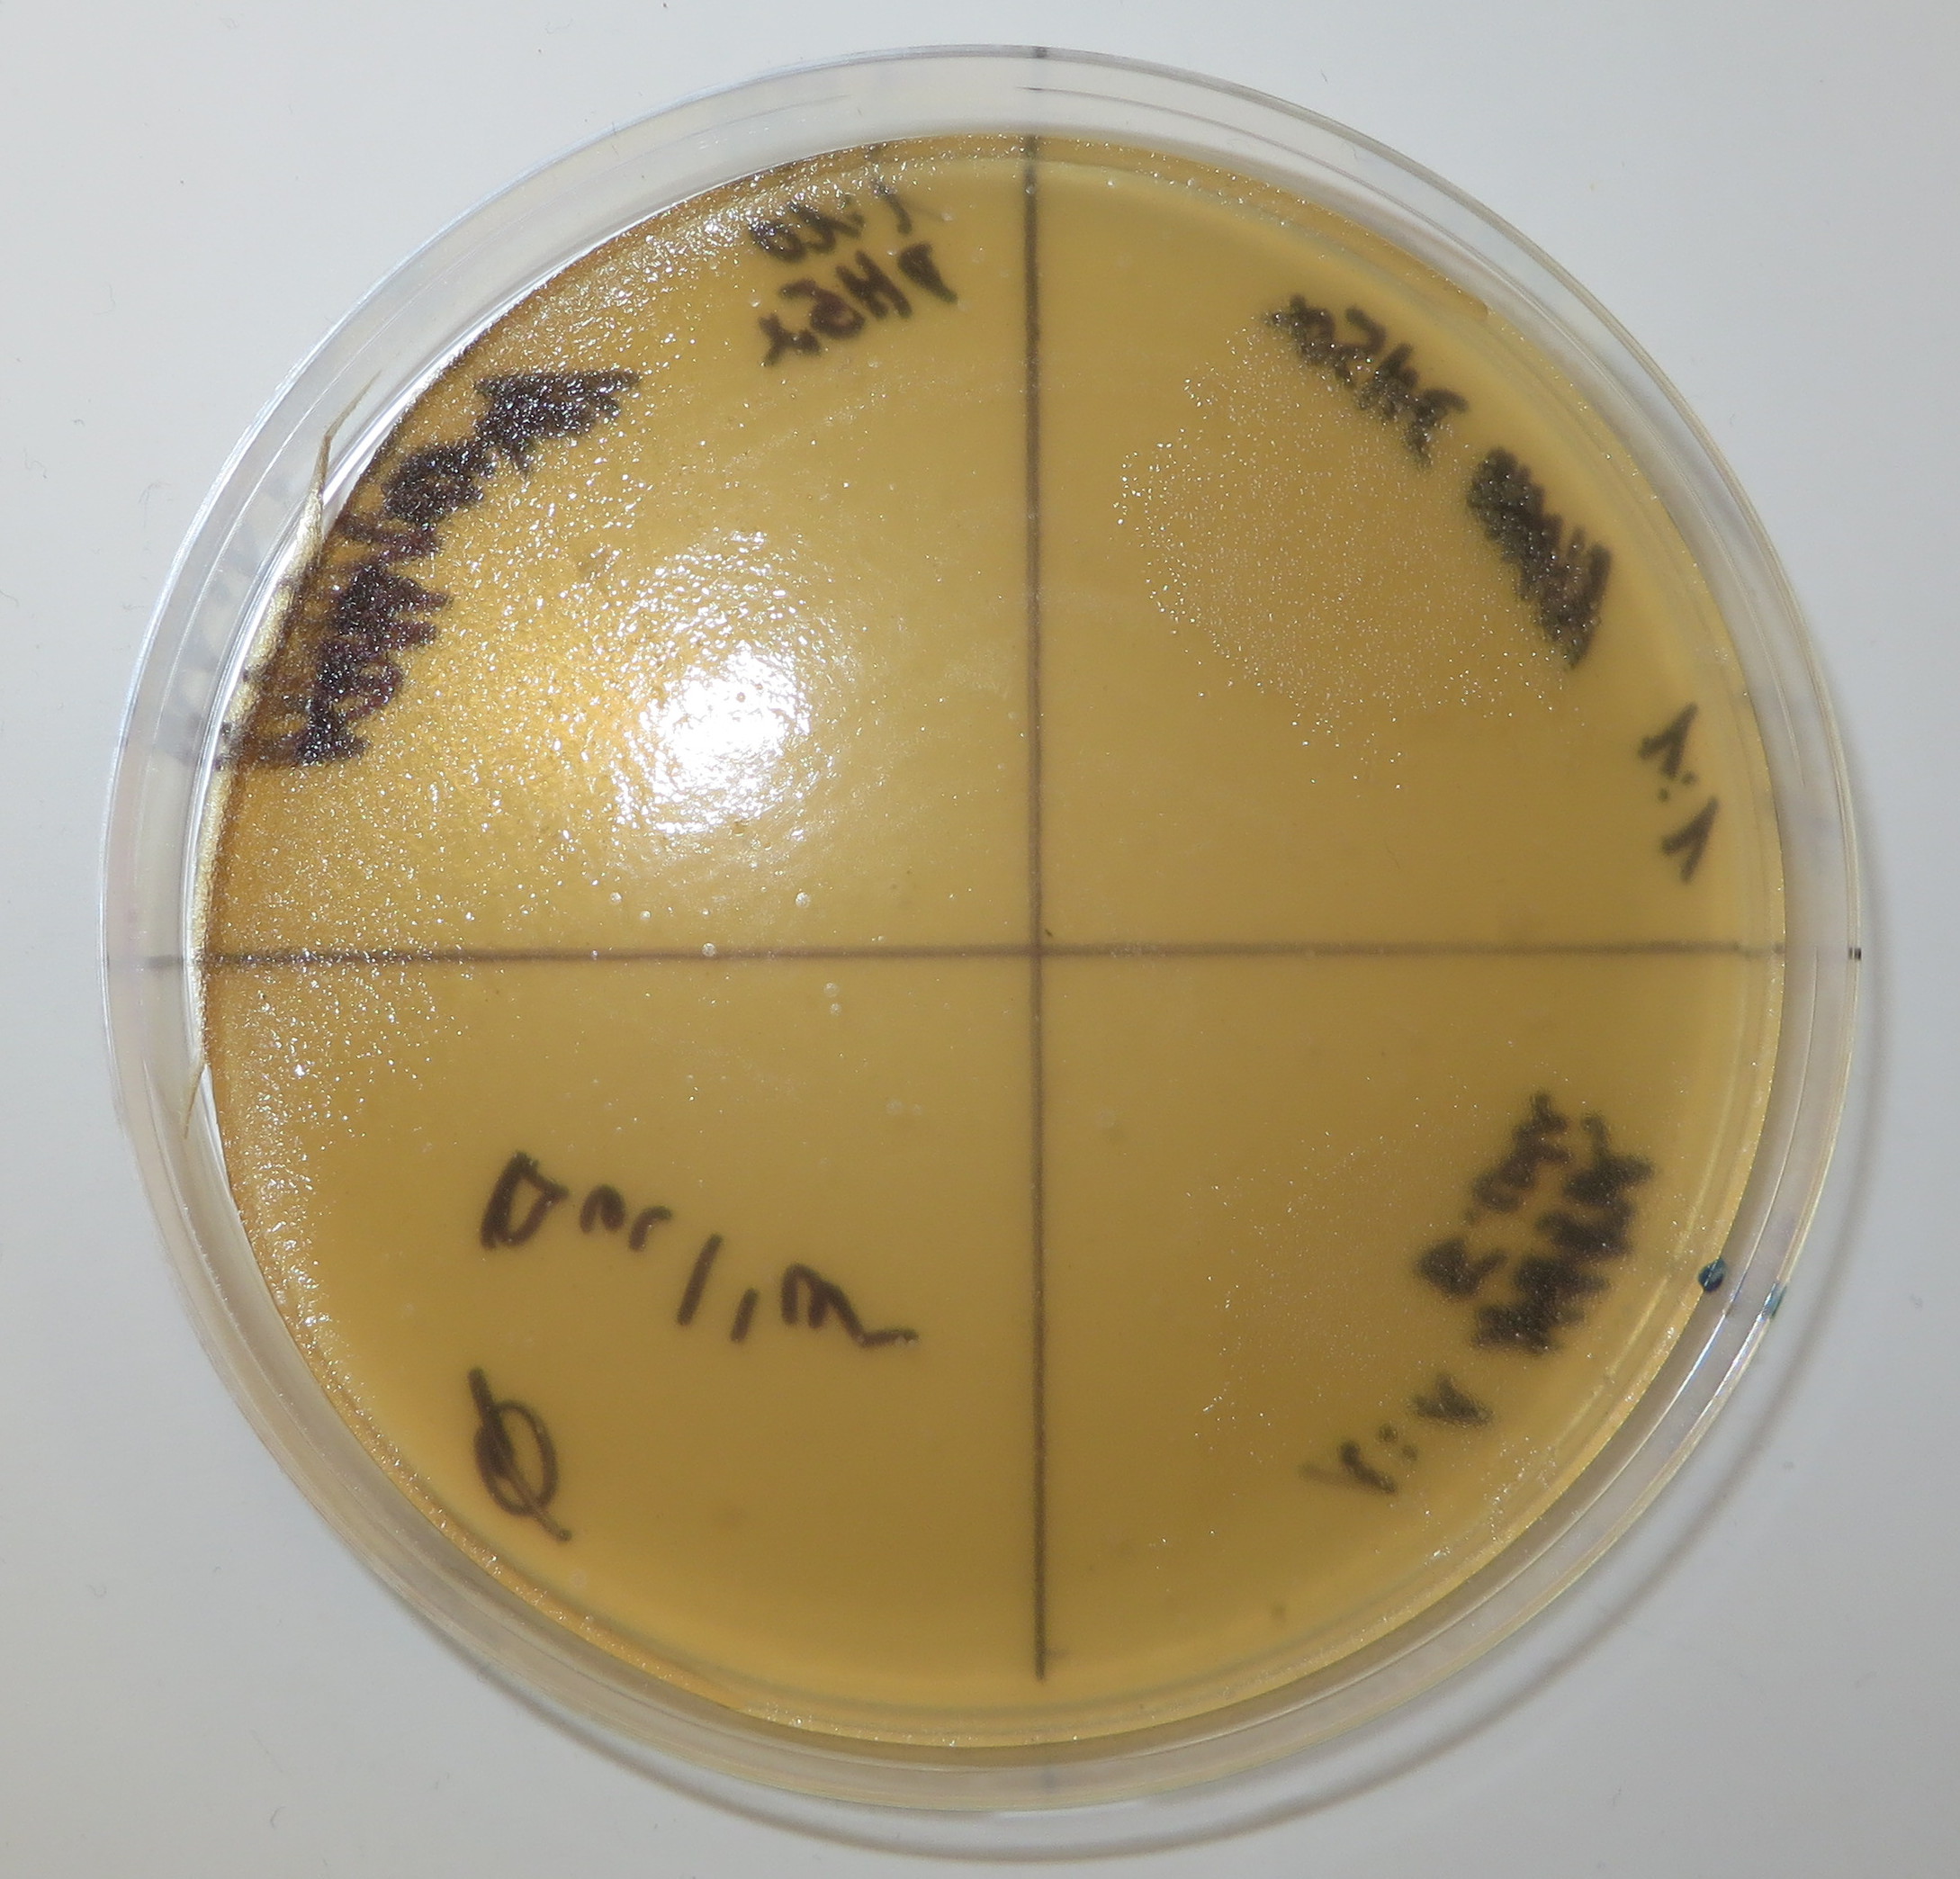
200 μl cells were plated onto a plate made with antibiotic and grew overnight at 37 °C. (cultures of transformed CL1blue on the right)
Results:
BS21- no cultures on the plate with antibiotic. The cells grew on an agar plate without antibiotic. So probably no or very little transformation
XL1blue - few cultures (approx 20) on the plate with antibiotic. So WE HAVE TRANSFORMATION.
We then tested the transformed XL1blue cells to see if there was fluorescence (after growing in liquid culture with IPTG (1:1000)). The cells showed fluorescence.
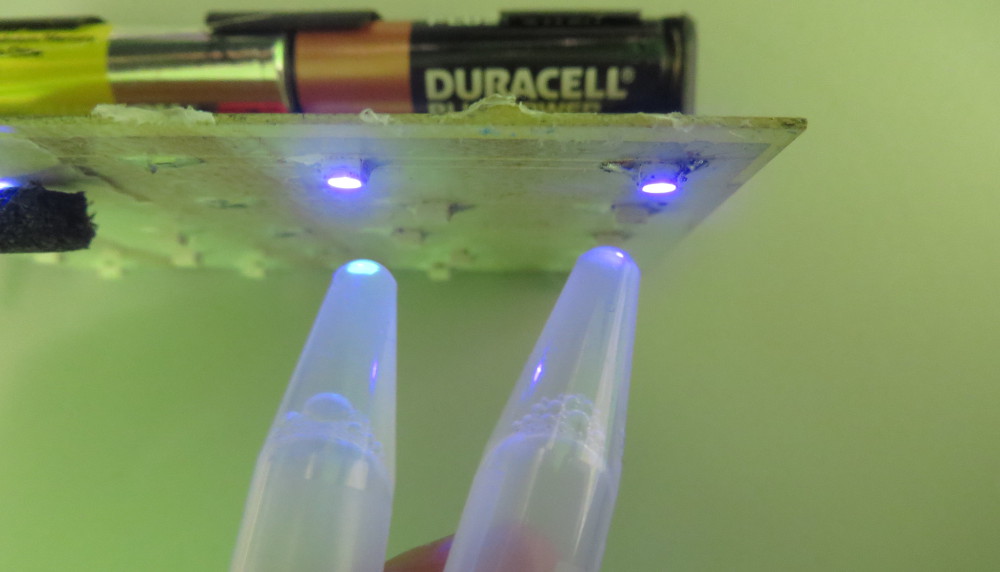
strong fluorescence on the pellet of XL1blue cells (left) compared with cells that were not activated.
Why did BS21 not transform? We found on TTS buffer (link):
Transformation efficiencies depend on the strain of E. coli, as well as the nature and quality of the transforming DNA. For example, the transformation efficiencies observed for E. coli strains DH1, DH5α, HB101, JM109, LE392, MM294, SCS-1, and XL1-Blue ranged from 1.5 x 10⁷ to 1.0 x 10⁸/µg of DNA.
THANKS FOR READING
Protocols and resources:
Inoculating a Liquid Bacterial Culture - https://www.addgene.org/plasmid-protocols/inoculate-bacterial-culture/
Creating Bacterial Glycerol Stocks for Long-term Storage of Plasmids - https://www.addgene.org/plasmid-protocols/create-glycerol-stock/
LB and LB agar recibies: Protocols/LBAgar.txt
Protocols
- plasmid isolation / mini-prep (Qiagen / Boiling-lysozyme method / non-ionic detergent / homebrew alkaline-lysis)
- competent bacteria (TSS method)
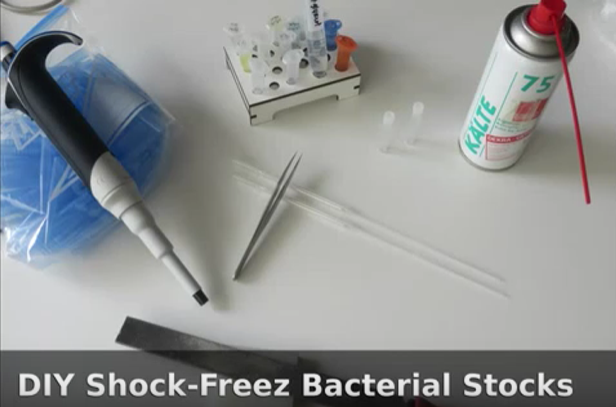
How to shock freeze cultures in DIY with a cold spray - Video