Open.Theremin V3 Build Instructions

The Open.Theremin is a DIY (do it your self) project to build your own real theremin. With the open source hardware and software description you can learn about it's functionality, build your own and adapt it to your needs. The electronic circuit is available as a assembled and tested board in a kit with easy to solder electronic and mechanical parts. The electronic circuit needs to be combined with an Arduino UNO, the popular open source electronic development platform and a pair of antennas to make it a playable instrument.
Contents of the kit:

Building step by step:
1. Complete the shield - solder the pins, the push button, LEDs and the knobs
2. Connect a pair of antennas
3. Connect an audio system such as an active speaker or audio system
4. Set up and Grounding
5. Programming the arduino
6. Starting the auto-calibration
And you theremin is ready to play.
Here is the detailed in instruction manual:
Antennas
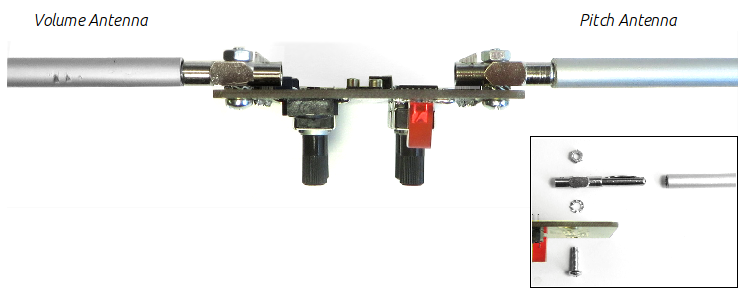
You can basically use any electrically conductive material as antennas. The picture shows how to connect two aluminium rods (can be found in most hardware stores) with an inner diameter of 4 mm using the supplied spring plugs (banana plugs). The total length per antenna should be around 40 to 50 cm. You can easily bend antennas form aluminium tubes of 6 mm diameter by hand to the desired shape. To build the theremin into a case you can also use stiff wire to connect the antennas.
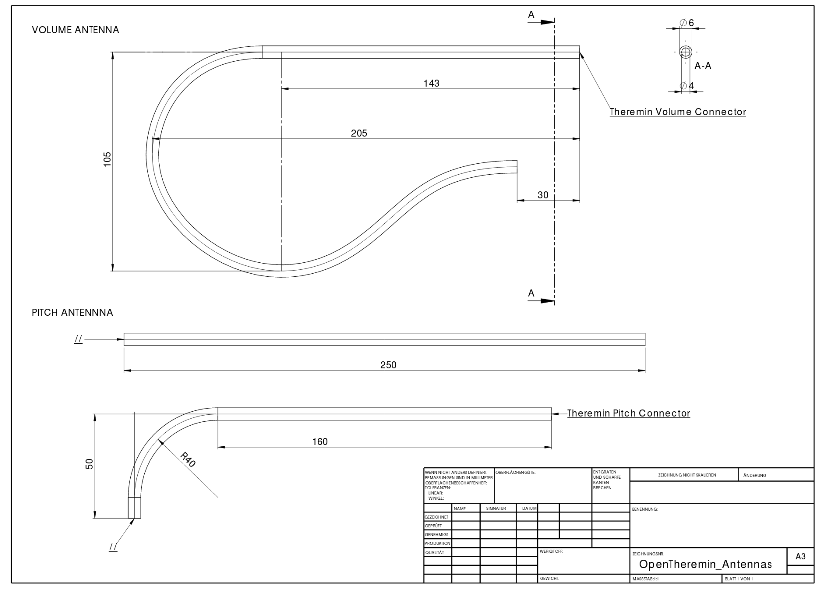
The following drawing shows how typical theremin antennas would be bent: